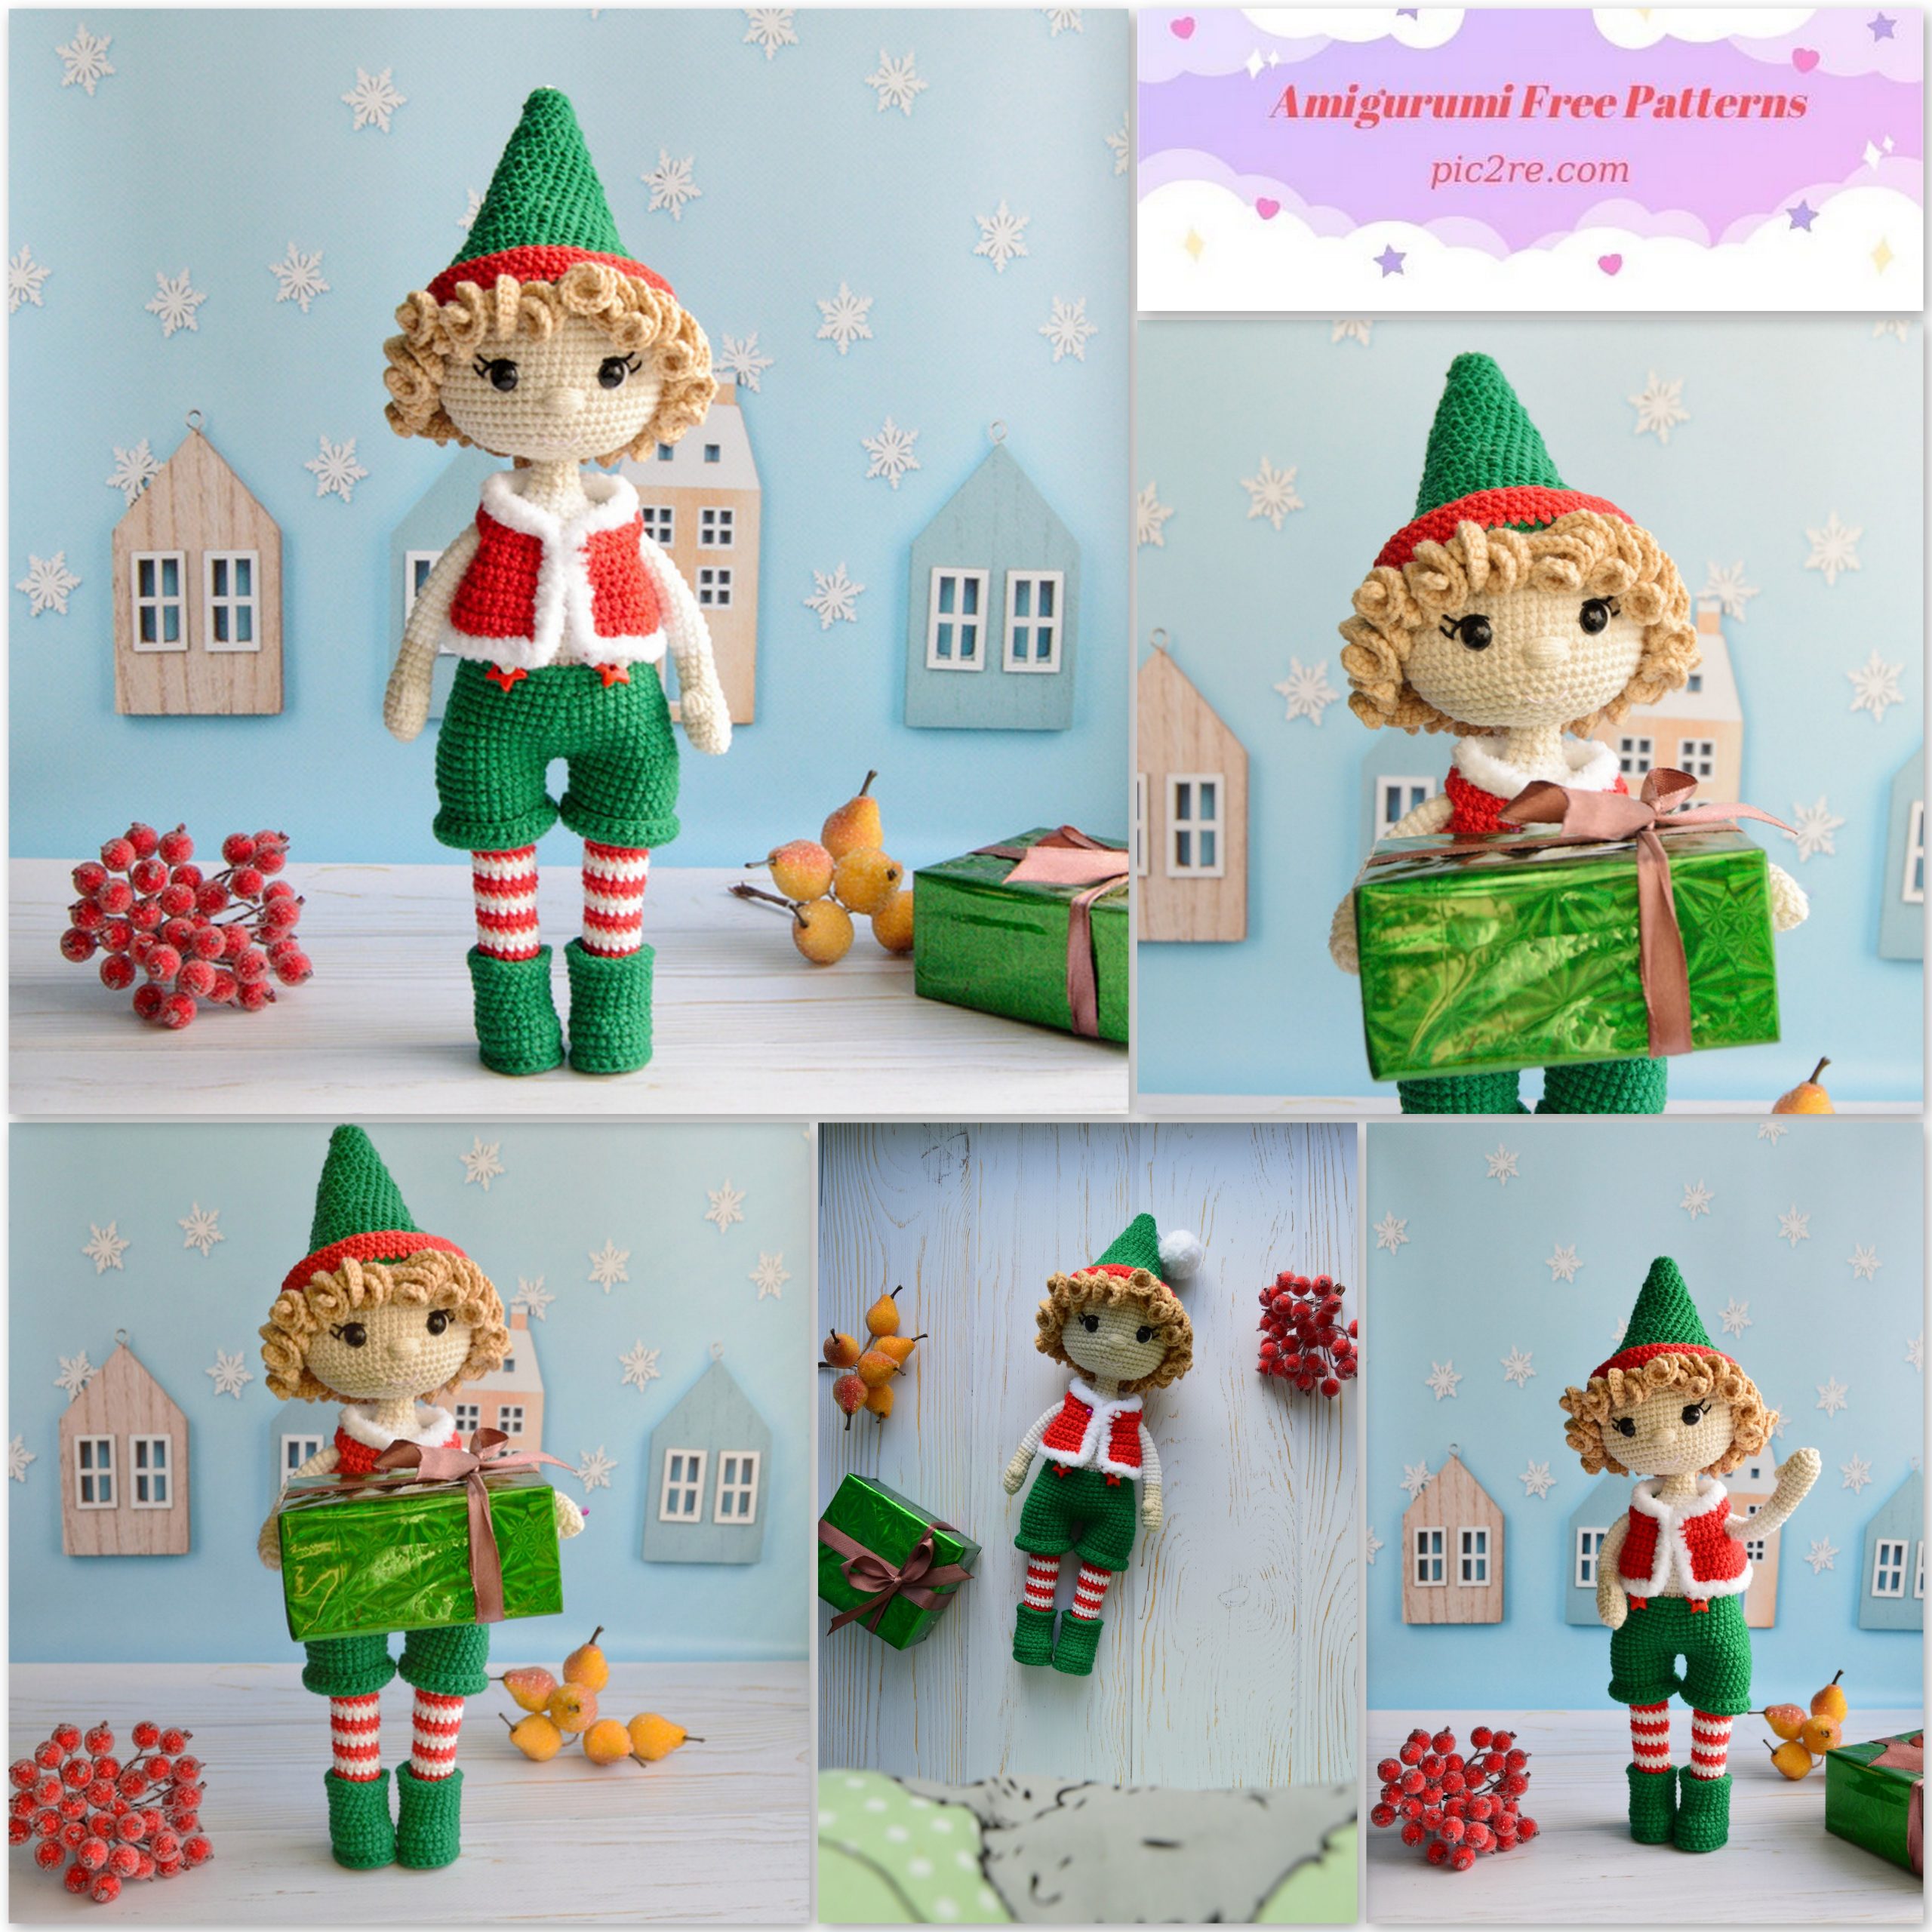
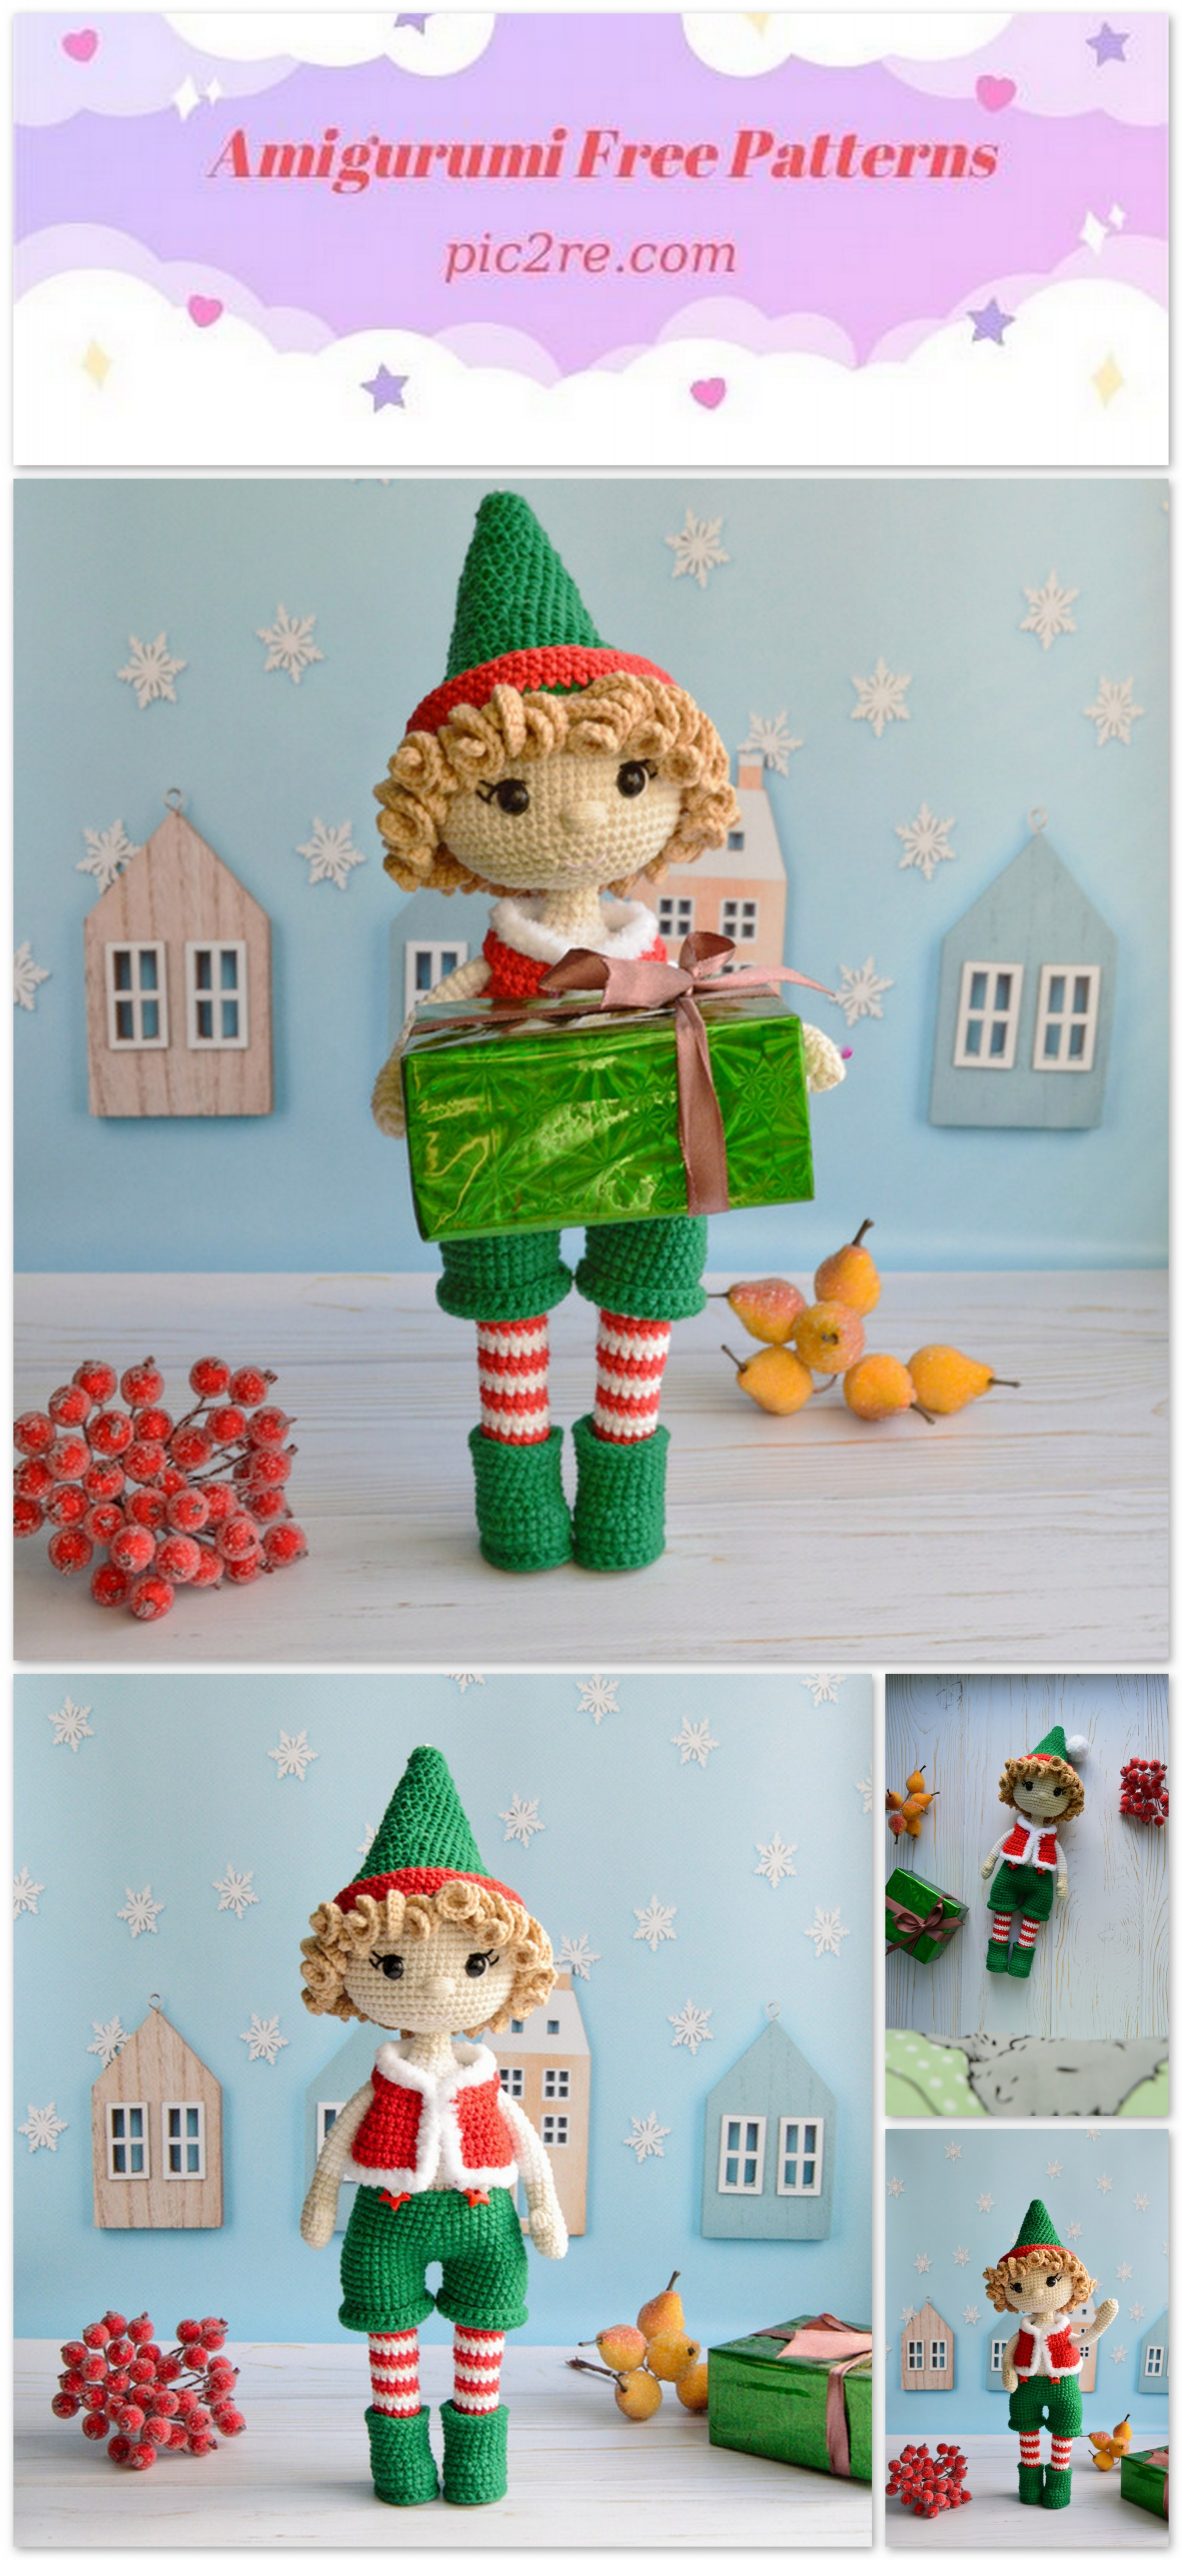
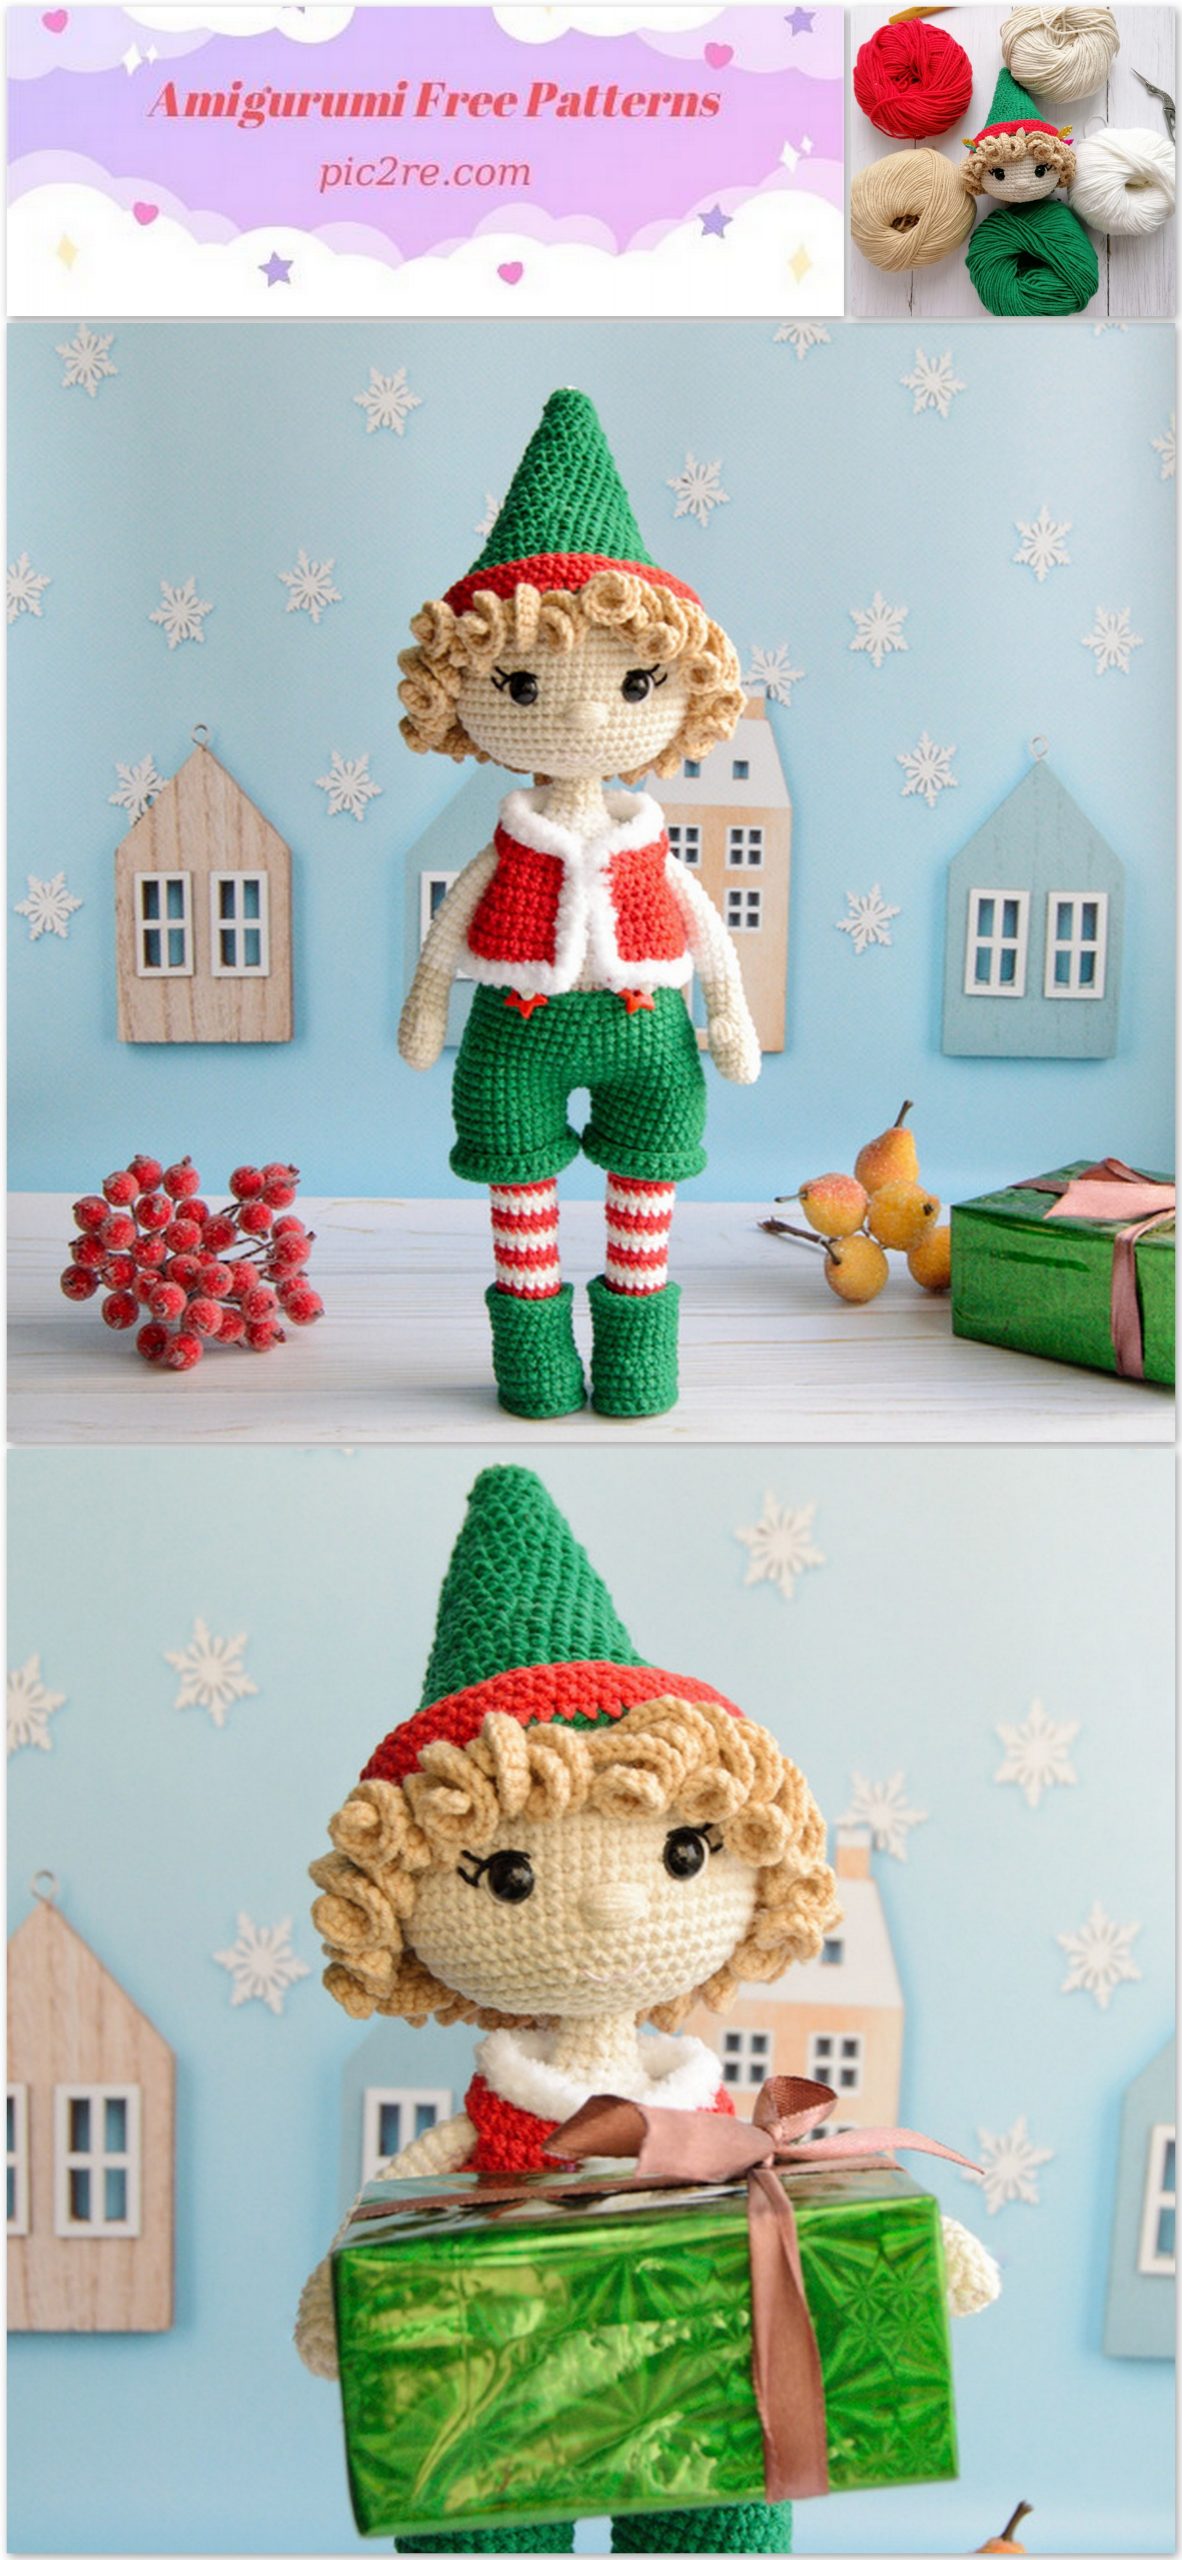
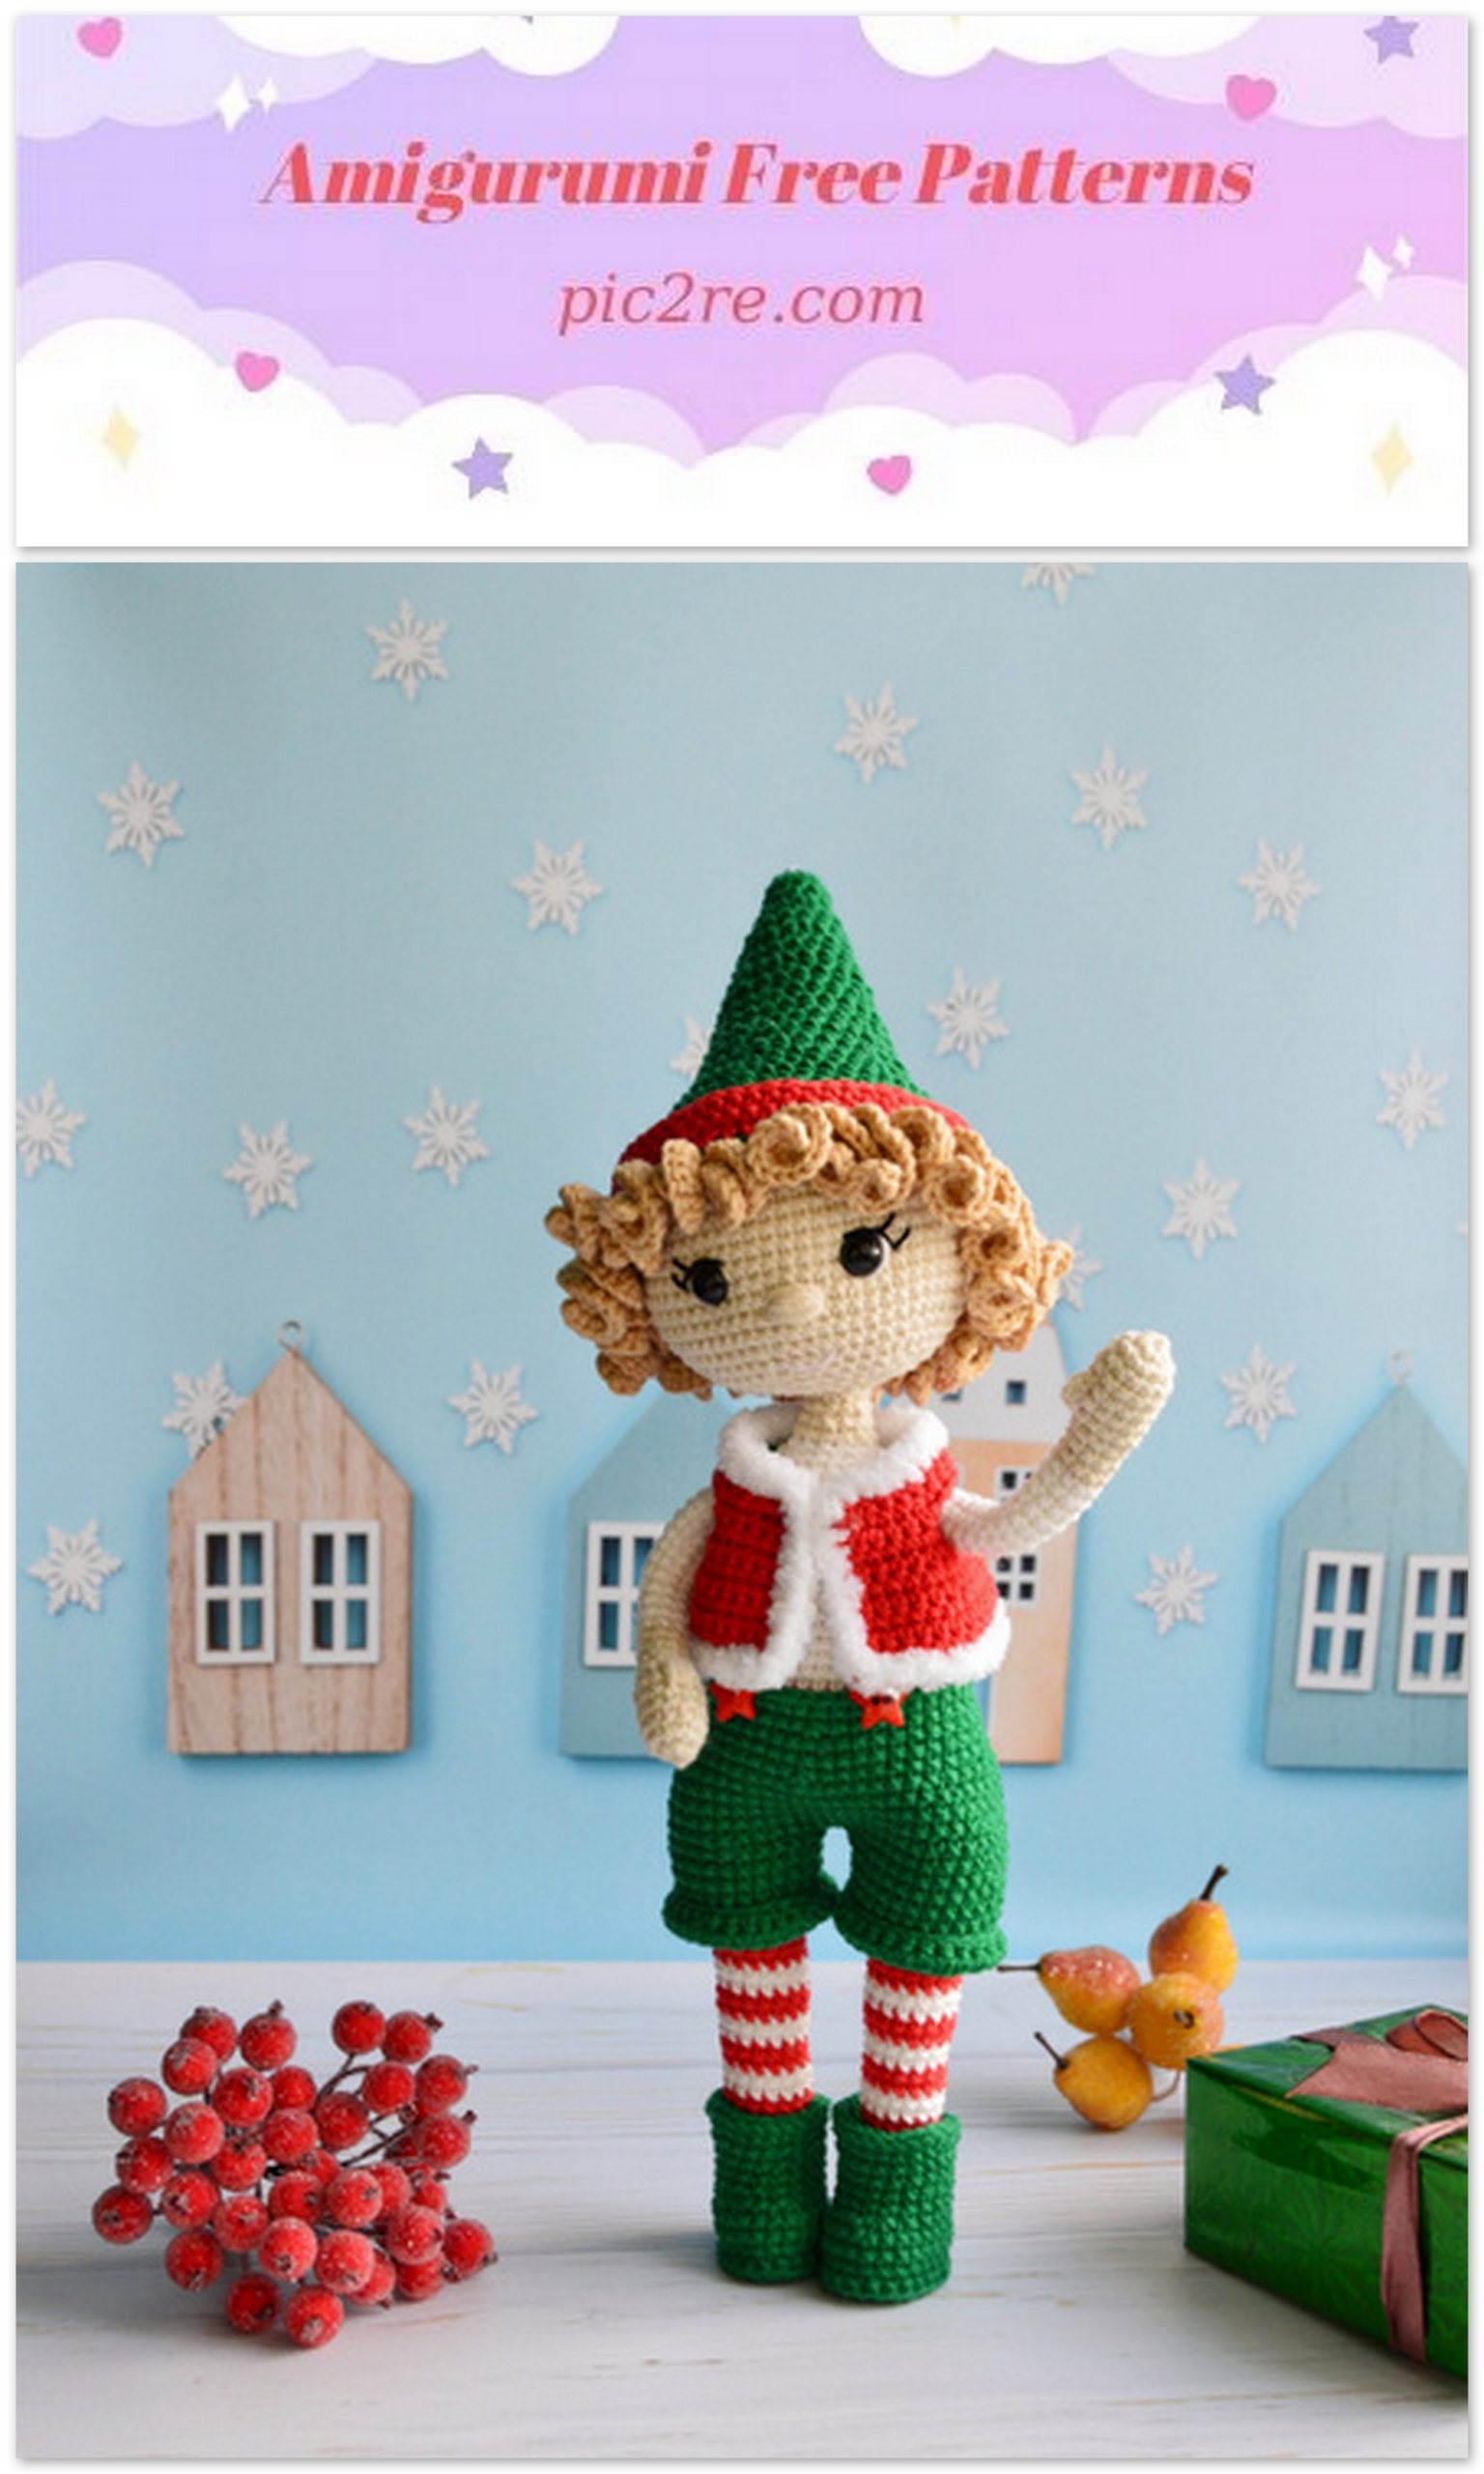
Amigurumi Christmas Elf Free Crochet Pattern
Crochet Pattern
Christmas Elf
Let’ s respect others work.
We continue to share the most beautiful free amigurumi patterns. The new year is approaching, we should start knitting the toys. You can browse our website for amigurumi christmas elf free patterns and more.
Abbreviations:
1) ch – chain
2) sc – single crochet
3) inc – increase (2 sc in one stitch)
4) dec – decrease (2 sc together)
5) sl st – slip stitch
6) MR – magic ring
7) BLO – back loops only
8) sc3tog – 3 sc together
9) hdc – half double crochet
10) hdcinc – half double crochet increase (2 hdc in one stitch)
11) 3-dc cluster – crochet 3 dc in one stitch with a common top
1) Yarn YarnArt Jeans:
No.05 (body color)
No.07 (light beige)
No.52 (green color)
No.51 (red color)
No.62 (white color)
2) Alize softy No.55
3) Scissors
4) Hook by Clover 2 mm
5) Safety eyes size 9mm
6) Long needle for needle sculpting and sewing pieces
7) Adhesive plaster
8) Wire 1mm (for frame)
9) 2 buttins for decor
10) Piece of plastic
Materials and Tools:
1) 6sc in MR
2) 6inc (12)
3-5) 12sc (3 rounds)
6) 5sc, 3-dc cluster, 6sc (12)
7) 12sc
Stuff only palm
8) (2sc, dec)*3 (9)
9-10) 9sc (2 rounds)
Change color to white:
11-24) 9sc (14 rounds)
Fasten off and cut the yarn.
Insert a wire into the arm.
Arms (make 2):
Begin crocheting with white color.
1) 7ch, start in the second chain from the hook: inc, 4sc, 3sc in the last chain, 5sc (14)
2) 2inc, 4sc, 3inc, 4sc, inc (20)
+ 2 extra sc, marker is sctrictly in the middle of the heel. Align the marker in the process.
3) BLO 20sc
4) 20sc
Cut the plastic insole to fit the foot and glue it.
Legs (make 2):
5) 5sc, dec*2, 2sc, dec*2, 5sc (16)
6) 5sc, dec*3, 5sc (13)
At this stage, insert a wire, twisted in half.
Bend it with a loop on the foot (shown in the photo) and insert it into the leg. After inserting the wire, add fiberfill.
Change color to red and alternate white and red colors every 2 rounds.
There should be no fiberfill between the insole and the wire.
7-8) 13sc (2 rounds)
Сhange color to white
9) 13sc
10) 12sc, inc (14)
Сhange color to red
11) 3sc, inc, 6sc, inc, 3sc (16)
12) 16sc
Сhange color to white
13-14) 16sc (2 rounds)
Сhange color to red
15-16) 16sc (2 rounds)
Сhange color to white
17-18) 16sc (2 rounds)
Сhange color to red
19-20) 16sc (2 rounds)
Сhange color to white
21-22) 16sc (2 rounds)
Сhange color to red
23-24) 16sc (2 rounds)
Сhange color to white
25) 3sc, inc, 8sc, inc, 3sc (18)
26) 18sc
Сhange color to red
27-28) 18sc (2 rounds)
Сhange color to white
29-30) 18sc (2 rounds)
Сhange color to red
31-32) 18sc (2 rounds)
Сhange color to white
33) 18sc
Fasten off and cut the yarn.
Do not cut the yarn on the second leg, continue crocheting the body.
1) 5sc on the second leg, ch5, (count 5sc counterclockwise on the first leg and insert the hook into this loop, this is the center of the inner thigh), 18sc on the first leg, 5sc on the chain, 18sc on the second leg, 5sc on the chain (46)
Change color to red
2) 44sc – place the marker, it should be in the center of the back
3) 46sc
Сhange color to white
4-5) 46sc (2 rounds)
Сhange color to red
6-7) 46sc (2 rounds)
Twist both wires together.
Body:
Сhange color to white
8) (21sc, dec)*2 (44)
9) 10sc, dec, 20sc, dec, 10sc (42)
Сhange color to red
10) BLO (5sc, dec)*6 (36)
11) 36sc
Сhange color to white
Leave red yarn tail about 30 cm long and pull it in front.
12) BLO 36sc
13-14) 36sc (2 rounds)
15) (10sc, dec)*3 (33)
16-17) 33sc (2 rounds)
18) (9sc, dec)*3 (30)
19-23) 30sc (4 rounds)
Join the arms:
24) 5sc, 5sc on the arm, 10sc, 5sc on the second arm, 5sc (30)
25) 5sc, 4sc on the arm, 10sc, 4sc on the arm, 5sc (28)
26) 4sc, dec*3, 8sc, dec*3, 4sc (22)
Twist all the wires together and wrap them with an adhesive plaster.
27) 4sc, sc3tog, 8sc, sc3tog, 4sc (18)
28) (sc, dec)*6 (12)
Change to body color
29-31) 12sc (3 rounds)
Fasten off and cut the yarn.
At this stage, I advise you to process the edge of the tights. For more details, see the link:
1) 6sc in MR
2) 6inc (12)
3) (sc, inc)*6 (18)
4) sc, inc, (2sc, inc)*5, sc (24)
5) (3sc, inc)*6 (30)
6) 2sc, inc, (4sc, inc)*5, 2sc (36)
7) (5sc, inc)*6 (42)
8) 3sc, inc, (6sc, inc)*5, 3sc (48)
9) (7sc, inc)*6 (54)
10) 4sc, inc, (8sc, inc)*5, 4sc (60)
11-20) 60sc (10 rounds)
Secure safety eyes between rounds 16-17 at a distance of 10sc.
21) 4sc, dec, (8sc, dec)*5, 4sc (54)
22) (7sc, dec)*6 (48)
23) 3sc, dec, (6sc, dec)*5, 3sc (42)
24) (5sc, dec)*6 (36)
25) 2sc, dec, (4sc, dec)*5, 2sc (30)
26) (3sc, dec)*6 (24)
27) sc, dec, (2sc, dec)*5, sc (18)
Head:
28) (sc, dec)*6 (12)
Fasten off and cut the yarn.
ch61, start in the second chain from the hook:
2sc; ch11, start in the second chain from the hook: 10inc; 2sc on the main chain.
Repeat to end of the chain.
Fasten off and cut the yarn, leaving a long tail for sewing.
Hair:
Embroider a nose 3sc long between rounds 18 and 19 (7 stitches).
How to make a needle sculpting, see the link:
Embroider whites of the eyes with White threads, eyelashes and eyelids – with black threads, a mouth – with pink threads.
Decoration:
Sew the hair on as per the photo.
Back view
Crochet with green color.
Hook by Clover 2 mm.
Make ch2 at the beginning of each round and
sl st at the end.
1) 8hdc in MR, sl st in first stitch
2) ch2, hdcinc, (hdc, hdcinc)*3 (12)
3) ch2, 11hdc
4) ch2, hdc, hdcinc, (2hdc, hdcinc)*3
5) ch2, 15hdc
6) ch2, 2hdc, hdcinc, (3hdc, hdcinc)*3
7) ch2, 19hdc
8) ch2, 3hdc, hdcinc, (4hdc, hdcinc)*3
9) ch2, 23hdc
10) ch2, 2hdc, hdcinc, (3hdc, hdcinc)*5
11) ch2, 29hdc
12) ch2, 3hdc, hdcinc, (4hdc, hdcinc)*5
13) ch2, 35hdc
14) ch2, 4hdc, hdcinc, (5hdc, hdcinc)*5
Cap:
15) ch2, 5hdc, hdcinc, (6hdc, hdcinc)*5
16) ch2, 47hdc
17) ch2, 6hdc, hdcinc, (7hdc, hdcinc)*5
18) ch2, 7hdc, hdcinc, (8hdc, hdcinc)*5
19) ch2, 59hdc
Change color to red. Fasten off and cut the green yarn, leaving a long tail for sewing.
20) ch1, turn and crochet counterclockwise
BLO (9sc, inc)*6 (66)
Continue crocheting without sl st and ch1
21-23) 66sc (3 rounds)
Fasten off and cut the yarn.
Sew the cap to the head.
Begin crocheting from the legs.
ch26 and join in the circle.
Next, crochet in a spiral without turning chain.
1-8) 26sc (8 rounds)
Fasten off and cut the yarn on the first leg.
Do not cut the yarn on the second leg and join
the first one.
9) ch2, 26sc on the first leg, 2sc on the chain, 26sc on the second leg, 2sc on the chain
10-12) 56sc (3 rounds)
Next, follow the marker. It should pass along the center of the back.
13) 13sc, dec, 26sc, dec, 13sc
14) 54sc
15) (7sc, dec)*6 (48)
16) (10sc, dec)*4 (44)
Shorts:
17-18) 44sc (2 rounds)
19) (20sc, dec)*2
20) 42sc
Fasten off and cut the yarn.
Bend the edge.
Crochet 36ch, from 7th chain on the hook: 30sl st. Cut the yarn and fasten off, leaving a long tail for sewing.
Sew buttons to the shorts.
Work in rows. Make ch1 and turn at the end of each row. ch34, start in the second chain from the hook:
1) 33sc
2) 5sc, inc, 10sc, inc, 10sc, inc, 5sc
3) 6sc, skip 6 stitches, 6ch, 12sc, skip 6 stitches, 6ch, 6sc
4) 5sc, inc, 6sc, inc, 10sc, inc, 6sc, inc, 5sc
5) 40sc
6) 4sc, inc, (9sc, inc)*3, 5sc
7) 44sc
8) 5sc, inc, (10sc, inc)*3, 5sc
9-10) 48sc (2 rows)
Change yarn to Alize softy and crochet around with sc.
Vest:
1) ch6, start in the second chain from the hook: inc, 3sc, 4sc in the last chain. Continue on the other side of the chain: 3sc, inc (14)
2) 2inc, 3sc, 4inc, 3sc, 2inc (22)
3) (10sc, inc)*2 (24) + extra sc
Marker is strictly in the center of the heel.
4) BLO 24sc
5-6) 24sc (2 rounds)
7) 7sc, 2dec, 2sc, 2dec, 7sc
8) 9sc, dec, 9sc
9-10) 19sc (2 rounds)
11) 5sc, inc, 6sc, inc, 5sc, inc (22)
12) 6sc, inc, 7sc, inc, 6sc, inc (25)
13) 25sl st
Fasten off and cut the yarn.
Attach the thread to front loops of round 3 and crochet around with sc.
Boots:
1) 6sc in MR
2) 6inc (12)
3) (sc, inc)*6 (180
4-6) 18sc (3 rounds)
7) (sc, dec)*6 (12)
8) 6dec
Change yarn to Jeans and crochet ch7.
Leave a long tail for sewing.
Sew the pompom on the cap.
Pompom:
Our Elf is ready!
Thank you for crocheting with me!