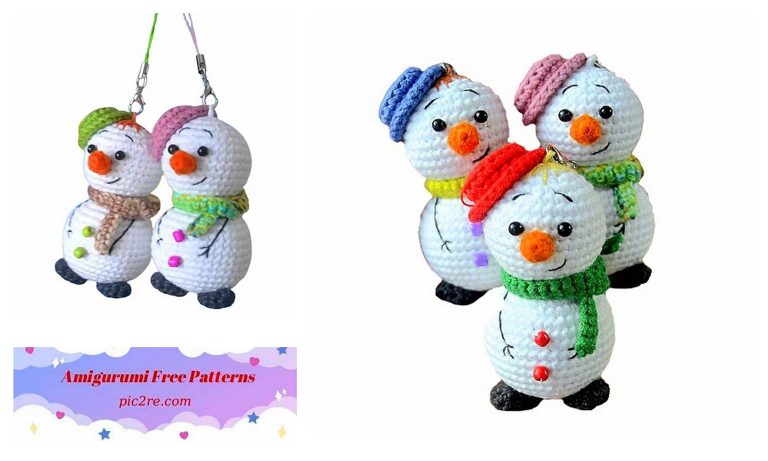
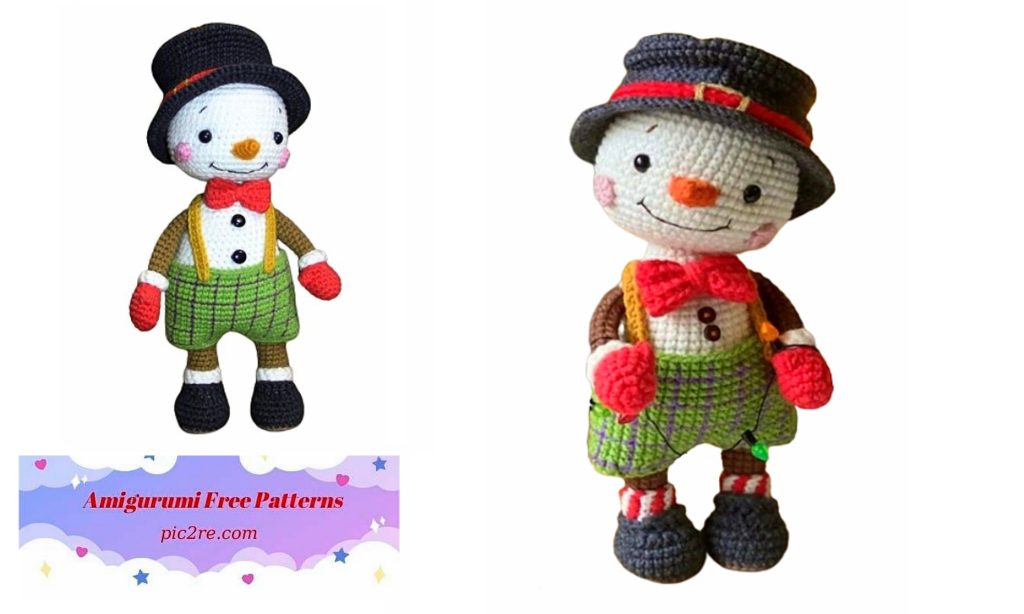
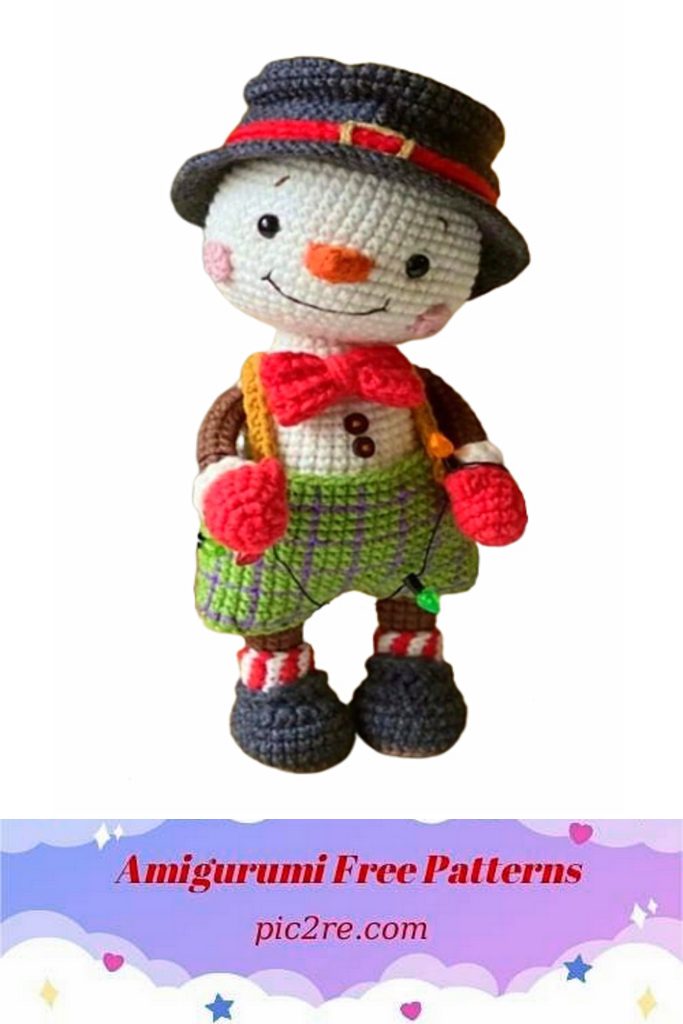
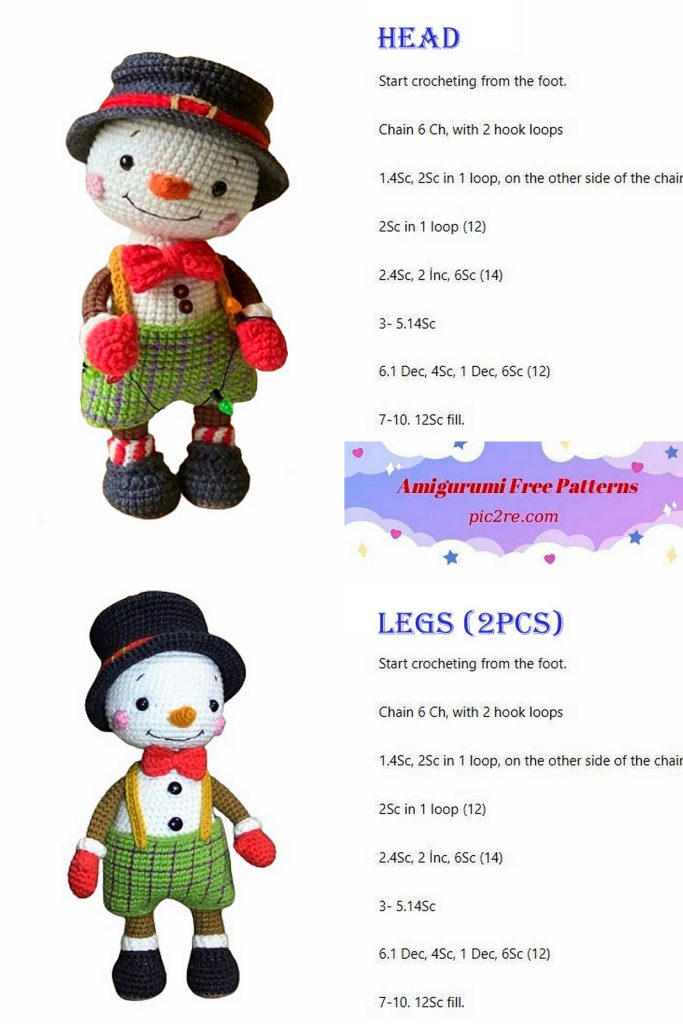
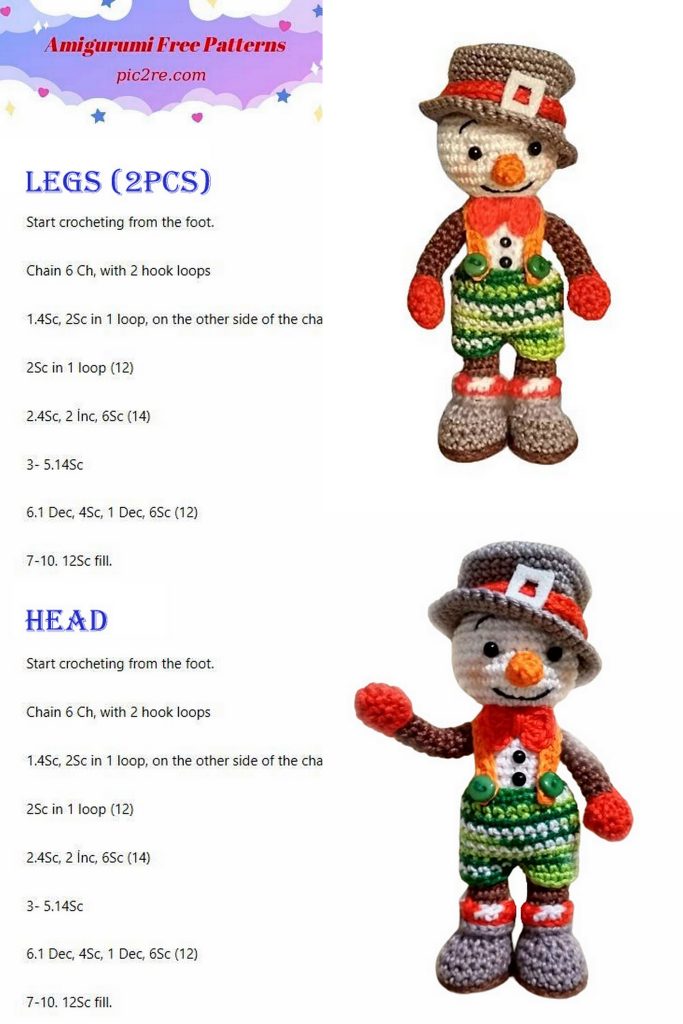
Free Snowman Amigurumi Pattern
Free Snowman Amigurumi Pattern This easy-to-follow pattern includes step-by-step instructions and helpful tips to guide you through each stitch, making it suitable for crocheters of all skill levels. With just a few basic crochet techniques and some yarn in your favorite colors, you’ll be able to create your own adorable snowman in no time. Free Snowman Amigurumi Pattern
From his rosy cheeks to his cozy scarf and hat, this charming snowman is sure to warm hearts wherever he goes. So grab your crochet hook and get ready to bring a little winter magic into your home with this delightful amigurumi pattern!
Necessary materials :
• We take yarn depending on what size you want to knit a toy:
• Colors of yarn: brown, white, orange, brown, green, etc. Gray.
• Threads “iris” for decoration (black)
• black buttons 3 mm
• 2 green buttons for panties.
• Hook No. 1.50 (1.25)
• Plastic and gypsy needle (for registration)
• Filler for toys (synthetic fluff or holofiber).
• Eyes No. 5 (2) + some white felt
• Wire, (chenille wire) wire cutters
• Glue (crystal – moment)
Abbreviations
MR – amigurumi ring
SC – single crochet
DC – snack column
İNC – increase
DEC – decrease
CH – air loop
FLO – front floor eyelet
BLO – rear floor eyelet
We knit the whole body together, without sewing.
As we knit, fill with filler.


Manufacturers – hands (in red)
1.5 MR
2.5×2 (10)
3. (10)
4.3 SC., 3 DC in one loop with one vertex, 6 SC. (thumb)
5. SC. kill 2 SC. DEC. SC. DEC. (7)
6. For BLO. (brown) (white piping
SC. – for FLO. )
7. – 13. (7)
Tighten thread trim
Legs – Brown:
4 CH.
1.2 SC. (3 SC in one loop) SC., İNC.
2. İNC., SC., 3 İNC., 2 SC., İNC., SC.
3. İNC., 4 SC., 3 İNC., 4 SC., İNC. (18) Tie
4.T. gray: (18)
5. (18)
6. (18)
7.5 SC., 4 DEC., 5 SC. (14)
8. DEC. 3 SC., 3 DEC., 3 SC. (ten)
9. Change the color (brown) and knit for BLO:
4 SC. DEC. 4 SC. (9) – (strapping SC. – for FLO: SC., İNC.)
10. – 15. (9) – (5 rows) (Right leg + 2 loops.
Trim the thread.

Body: – white.
Connect both legs 3 CH.
1. Knit in a circle: 9 SC. (3 SC. By CH.), 9 SC. (3 SC. By CH.) (24)
2. 8 SC. İNC. 3 SC. İNC. 11 SC. (26)
3. – 7. (26) 5 rows
8.7 SC. DEC. 2 SC. 2 DEC. 2 SC. DEC. 7 SC. (22)
9.7 SC. DEC. 4 SC. DEC. 7 SC. (twenty)
10. (20)
11. (20)
12. + hands: 4 SC. (3 SC., With hand), 7 SC. (3 SC., With hand), 3 SC.
13.4 SC. (4 SC., With hand), 7 SC. (4 SC., With hand), 3 SC.
If you want the snowman’s handles to move, insert the wire.
14. 3 SC. 4 DEC., 3 SC. 4 DEC.,
15.2 SC. 2 DEC. 4 SC. 2 DEC. (10)
✔16. Neck: (10)
✔ 17. Head: 10X2 (20)
18. (SC. İNC.) * 10 (30)
19. (9 SC.İNC.) * 3 (33)
20. – 24. (33) – 5 rows
25. (5 SC., DEC.) * 4, 3 SC. DEC.
26. (4 SC., DEC.) * 4, 2 SC. DEC.
27. (3 SC., DEC.) * 4, SC. DEC.
28. (2 SC., DEC.) * 4, 2 SC.
29. (SC. DEC) * 4, DEC.
30.2 DEC., Screw up, tighten, cut and hide the thread.

Pants – green
25 CH., Connect two ends and knit 10 rows in a circle – SC.
11 row, knit 12 SC., Fasten and cut the thread, skip the loop, with new thread knit 12 SC. fasten the thread, leave about 15-20 cm and cut .. put the orts on the snowman and sew between
legs.
Hat – gray
1.6 MR.
2.6×2 (12)
3. (SC., İNC.) * 6 (18)
4. (2 SC., İNC) * 6 (24)
5. (3 SC., İNC) * 6 (30)
6. (4 SC., İNC) * 6 (36)
7. – 13. knit “x” (grabbing the working thread through the top) (36)
14. for the front loop in the usual way (with a tick) – 5 SC. İNC (30)
15.6 SC. İNC,
16.7 SC. İNC.
17. strapping without İNC.
Red ribbon for the cap:
30 CH. into the second loop from hook 29 SC ..
Fasten the thread, leave a little for sewing, cut.
Wrap a red ribbon around the cap and join the edges, sew.
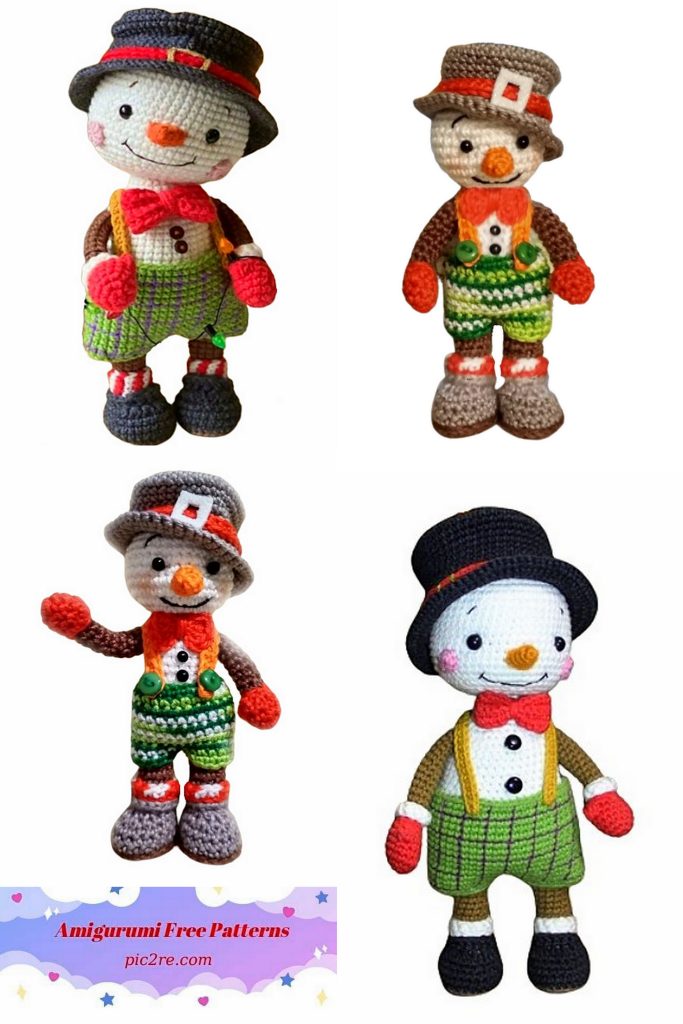
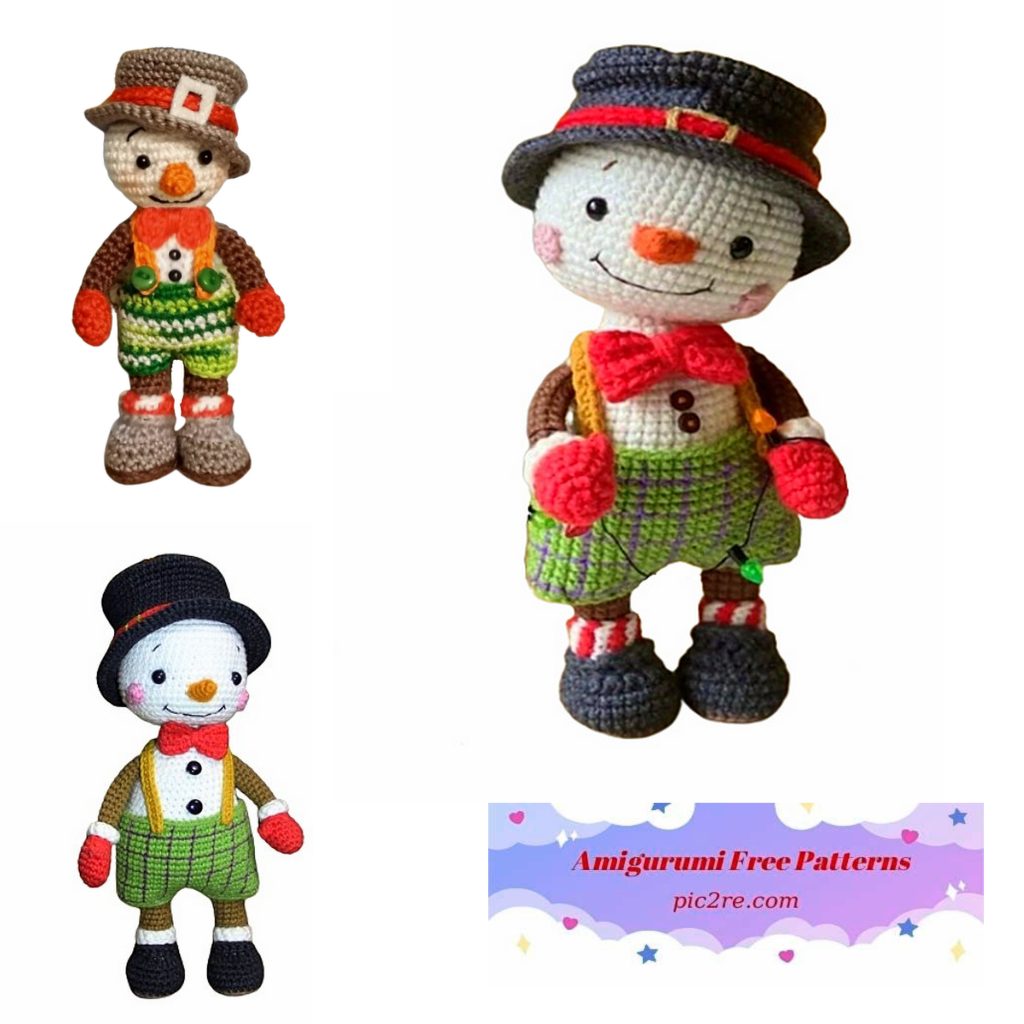
Cut out a small square in the form of a buckle from felt or foamiran and glue it onto a red ribbon. (see photo)
Nose – carrot (orange)
We knit in rotary rows: 2 MR.
1. turn 2×2 (4)
2. (SC. İNC.) * 2
Fasten the thread, leave a little for sewing and sewing.
Sew the edges together in a cone shape.
Pant straps (orange)
We knit 2 pcs.
20 CH., Turn 19 SC. fasten with a button.
Socks (color red and white)
We dial 13 CH. red, turn. In the second loop from the hook 2 SC (red), 2 SC. (white) etc. alternate to the end of the row
(12) Fasten the thread, tighten on the leg, fasten.
Bow (in red)
On the amigurumi ring, dial 3 CH in the first half of the ring. 2 DC. 3 CH. SL-ST, and the second half of the ring is 3 CH. 2 DC. 3 CH. SL-ST., Tighten (see photo)
Design
When registering, look at the photo, you can make a face tightening if you wish. Good luck and light loops.