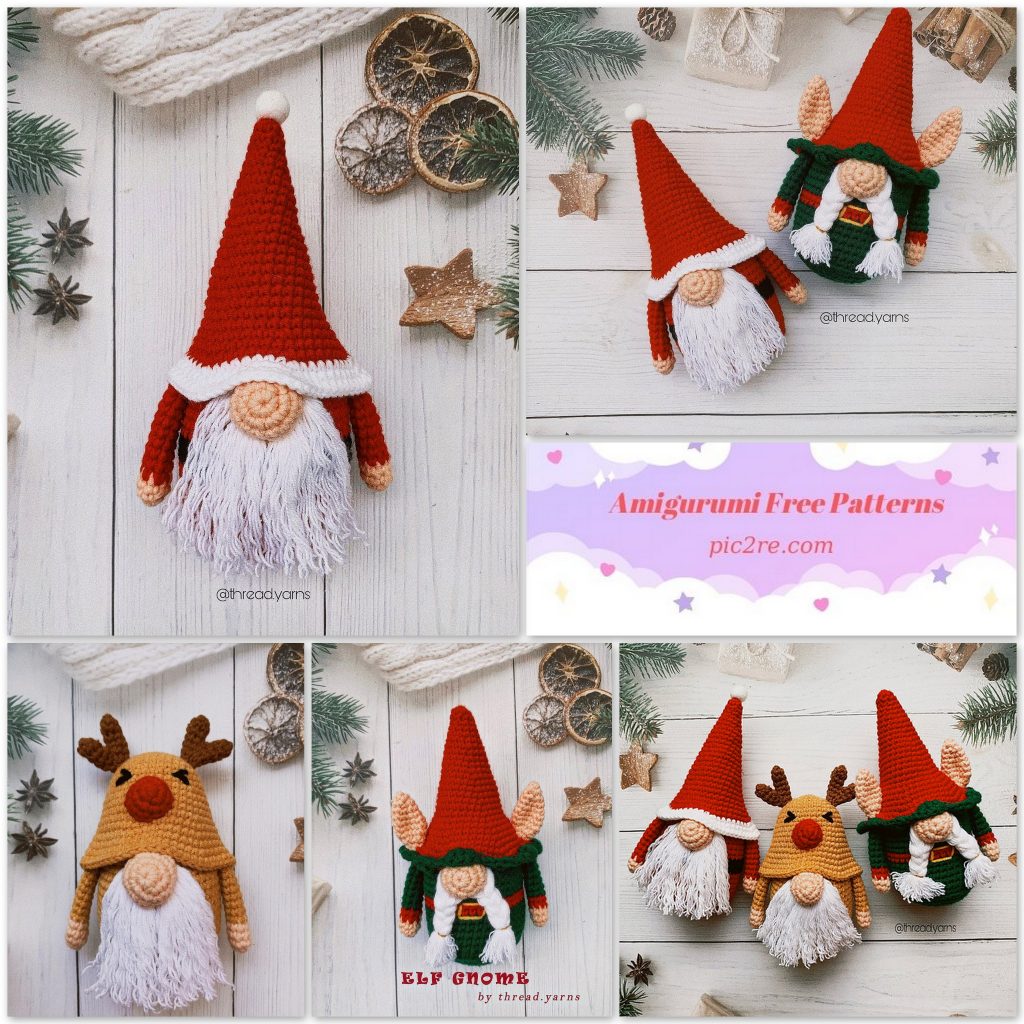
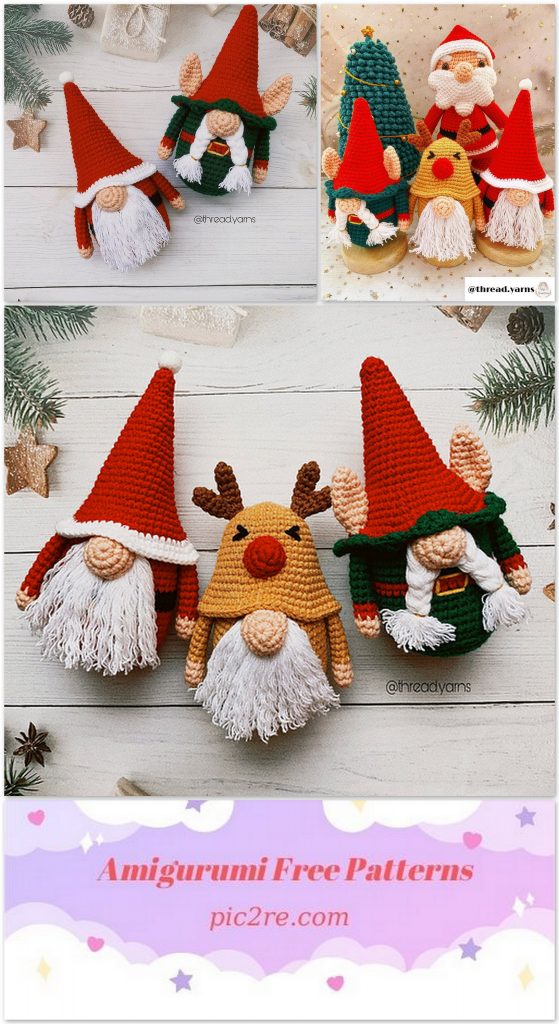
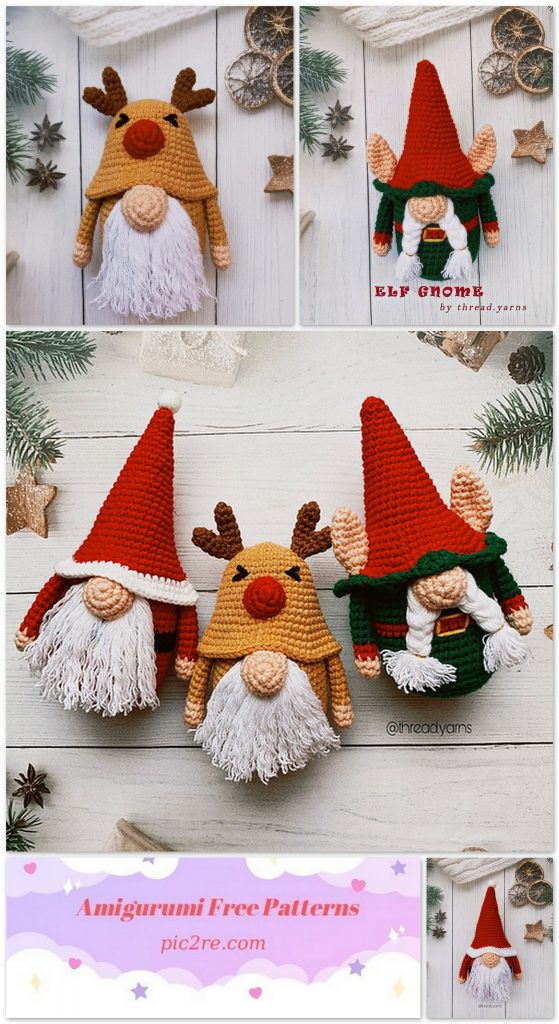
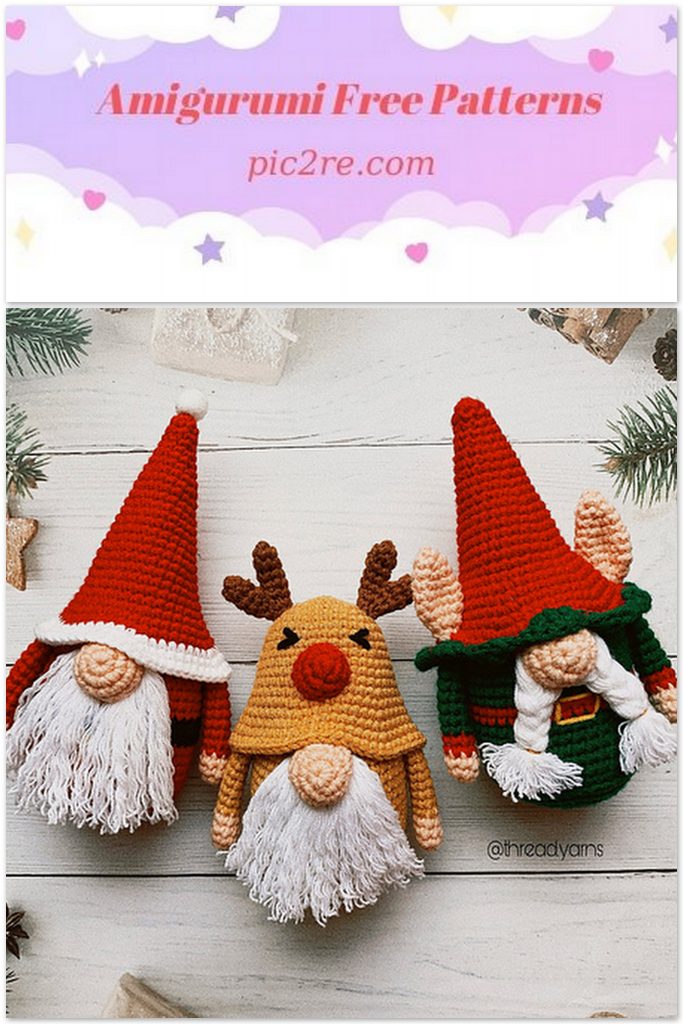
Amigurumi Christmas Gnomes Collection Free Pattern
CHRISTMAS GNOMES COLLECTION
The new year is approaching, have you started knitting Christmas toys? Here are some awesome amigurumi christmas gnomes free patterns and more.
SANTA GNOME
Materials:
–Yarn: I used MILK COTTON 4ply
–Hook: 3 mm. The item is 6 inches tall
-> For the final result to be well-shaped. I recommend you to used a hook that 0.5 or 1 size
smaller than what your yarn suggested.
– Fiber fill, yarn needle,
-Plastic canvas (optional if you want the gnome to stand on its own)
Abbreviation:
st – stitch
sc – single crochet
sl.st – slip stitch
BLO –Back loop only
only crochet to the back loop of the sts
How to change yarn color
inc – increase = make 2 sc from 1 st
dec – decrease = make 1 sc from 2 sts
Note:
– Stuffing as you go. Only stuff slightly the arms (do not over stuff the arms)
HEAD &BODY:
Working in spiral, using red yarn:
Rnd 1: magic ring with 6 sc
Rnd 2: 6 INC– 12 sts
Rnd 3: (sc in the next st, INC) x 6 – 18 sts
Rnd 4: (2sc in the next 2 st, INC) x 6 – 24 sts
Rnd 5: (3 sc in the next 3 st, INC) x 6 – 30 sts
Rnd 6: (4sc in the next 4st,INC) x 6 – 36 sts
Rnd 7: (5sc in the next 4st, INC) x 6 – 42 sts
Rnd 8: BLO 42 sc
Rnd 9-13: 42 sc
Chang to black
Rnd 14-15: 42 sc
Chang to red yarn
Rnd 16-21: 42 sc
Rnd 22: (5sc in the next 4st, DEC) x 6 – 30 sts
Rnd 23: (4sc in the next 4st, DEC) x 6 – 30 sts
Rnd 24: (3 sc in the next 3st, DEC) x 6 – 24 sts
Rnd 25: (2 sc in the next 2 st, DEC) x 6 – 18 sts
Rnd 26: (sc in the next st, DEC) x 6 – 12 sts
Rnd 27: 6 DEC – 6 sts
Fasten off.
ARMS: make 2
Working in spiral, start with skin color yarn:
Rnd 1: magic ring with 6 sc
Rnd 2: (sc in the next st, INC) x 3 – 9 sts
Rnd 3: 9sc
Change to red:
Rnd 4-12: 9sc
Rnd 13: (sc in the next st, DEC) x 3 – 6 sts
Rnd 14: fold in half, 2 sc.
Fasten off, leave yarn tail to sew to the body
NOSE:
Working in spiral, start with skin color yarn:
Rnd 1: magic ring with 6 sc
Rnd 2: 6 INC– 12 sts
Rnd 3: (3 sc in the next st, INC) x 3- 15 sts
Rnd 4: 15 sc
Invisible fasten off.
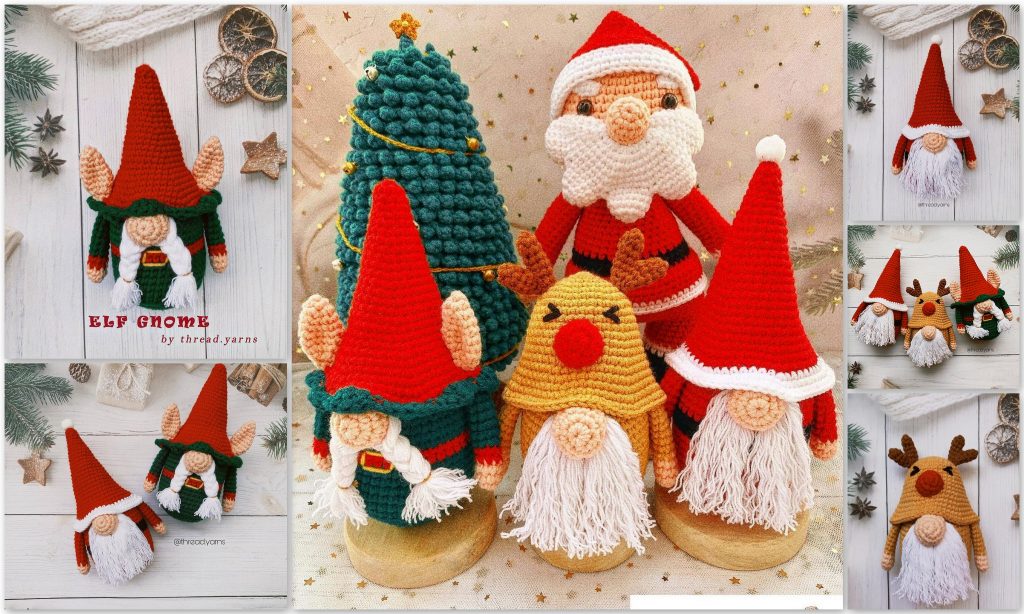
LONG TAIL HAT: (as shown in picture)
Working in spiral, start with red:
Rnd 1: magic ring with 6 sc
Rnd 2: 6 sc
Rnd 3: (sc in the next st, inc) x 3 – 9 sts
Rnd 4: 9 sc
Rnd 5: (2 sc in the next 2 st, inc) x 3 – 12 sts
Rnd 6: 12 sc
Rnd 7: (3 sc in the next 3 st, inc) x 3 – 15 sts
Rnd 8: 15 sc
Rnd 9: (4 sc in the next 4 st, inc) x 3 – 18 sts
Rnd 10: 18 sc
Rnd 11: (5 sc in the next 5 st, inc) x 3 – 21 sts
Rnd 12: 21 sc
Rnd 13: (6 sc in the next 6 st, inc) x 3 – 24 sts
Rnd 14: 24 sc
Rnd 15: (7 sc in the next 7 st, inc) x 3 – 27 sts
Rnd 16: 27 sc
Rnd 17: (8 sc in the next 8 st, inc) x 3 – 30 sts
Rnd 18: 30 sc
Rnd 19: (9 sc in the next 9 st, inc) x 3 – 33 sts
Rnd 20: 33 sc
Rnd 21: (10 sc in the next 10 st, inc) x 3 – 36 sts
Rnd 22: 36 sc
Rnd 23: (5 sc in the next 5 st, inc) x 6 – 42 sts
Rnd 24: 42 sc
Change to white
Rnd 25: (6 sc in the next 6 st, inc) x 6 – 48 sts
Rnd 26: (7 sc in the next 7 st, inc) x 6 – 54 sts
Rnd 27: (8 sc in the next 8 st, inc) x 6 – 60 sts
Invisible fasten off.
SHORT TAIL HAT: ( Optional – to make ornament)
Working in spiral, start with red:
Rnd 1: magic ring with 6 sc
Rnd 2: (sc in the next st, inc) x 3 – 9 sts
Rnd 3: (2 sc in the next 2 st, inc) x 3 – 12 sts
Rnd 4: (3 sc in the next 3 st, inc) x 3 – 15 sts
Rnd 5: (4 sc in the next 4 st, inc) x 3 – 18 sts
Rnd 6: (5 sc in the next 5 st, inc) x 3 – 21 sts
Rnd 7: (6 sc in the next 6 st, inc) x 3 – 24 sts
Rnd 8: (7 sc in the next 7 st, inc) x 3 – 27 sts
Rnd 9: (8 sc in the next 8 st, inc) x 3 – 30 sts
Rnd 10: (9 sc in the next 9 st, inc) x 3 – 33 sts
Rnd 11: (10 sc in the next 10 st, inc) x 3 – 36 sts
Rnd 12: (5 sc in the next 5 st, inc) x 6 – 42 sts
Rnd 13: (6 sc in the next 6 st, inc) x 6 – 48 sts
Change to white
Rnd 14: (7 sc in the next 7 st, inc) x 6 – 54 sts
Rnd 15: (8 sc in the next 8 st, inc) x 6 – 60 sts
Invisible fasten off.
ELF GNOME
Materials:
–Yarn: I used MILK COTTON 4ply
–Hook: 3 mm. The item is 6 inches tall
-> For the final result to be well-shaped. I recommend you to used a hook that 0.5 or 1 size
smaller than what your yarn suggested.
– Fiber fill, yarn needle,
-Plastic canvas (optional if you want the gnome to stand on its own)
Abbreviation:
st – stitch
sc – single crochet
sl.st – slip stitch
How to change yarn color
BLO –Back loop only
only crochet to the back loop of the sts
INC– increase = make 2 sc from 1 st
DEC– decrease = make 1 sc from 2 sts
DC: double crochet
Note:
– Stuffing as you go. Only stuff slightly the arms (do not over stuff the arms)
HEAD &BODY:
Working in spiral, using green yarn:
Rnd 1: magic ring with 6 sc
Rnd 2: 6 INC– 12 sts
Rnd 3: (sc in the next st, INC) x 6 – 18 sts
Rnd 4: (2sc in the next 2 st, INC) x 6 – 24 sts
Rnd 5: (3 sc in the next 3 st, INC) x 6 – 30 sts
Rnd 6: (4sc in the next 4st,INC) x 6 – 36 sts
Rnd 7: (5sc in the next 4st, INC) x 6 – 42 sts
Rnd 8: BLO 42 sc
Rnd 9-13: 42 sc
Chang to red
Rnd 14-15: 42 sc
Chang to green
Rnd 16-21: 42 sc
Rnd 22: (5sc in the next 4st, DEC) x 6 – 30 sts
Rnd 23: (4sc in the next 4st, DEC) x 6 – 30 sts
Rnd 24: (3 sc in the next 3st, DEC) x 6 – 24 sts
Rnd 25: (2 sc in the next 2 st, DEC) x 6 – 18 sts
Rnd 26: (sc in the next st, DEC) x 6 – 12 sts
Rnd 27: 6 DEC – 6 sts
Fasten off.
ARMS: make 2
Working in spiral, start with skin color yarn:
Rnd 1: magic ring with 6 sc
Rnd 2: (sc in the next st, inc) x 3 – 9 sts
Rnd 3: 9sc
Change to red:
Rnd 4-5: 9sc
Change to green
Rnd 6-12: 9sc
Rnd 13: (sc in the next st, dec) x 3 – 6 sts
Rnd 14: fold in half, 2 sc.
Fasten off, leave yarn tail to sew to the body
NOSE:
Working in spiral, start with skin color yarn:
Rnd 1: magic ring with 6 sc
Rnd 2: 6 INC– 12 sts
Rnd 3: (3 sc in the next st, INC) x3 – 15 sts
Rnd 4: 15 sc
Invisible fasten off.
EARS : make 2
Working in spiral, start with skin color yarn:
Rnd 1: magic ring with 6 sc
Rnd 2: (1 sc in the next st, INC) x3 – 9 sts
Rnd 3: 9 sc
Rnd 4: (2 sc in the next 2 st, INC) x 3- 12 sts
Rnd 5-7: 12 sc
Rnd 8: 6 DEC– 6 sc
Fasten off. Leave a long tail to sew.
LONG TAIL HAT: (as shown in picture)
Working in spiral, start with red:
Rnd 1: magic ring with 6 sc
Rnd 2: (sc in the next st, inc) x 3 – 9 sts
Rnd 3: (2 sc in the next 2 st, inc) x 3 – 12 sts
Rnd 4: (3 sc in the next 3 st, inc) x 3 – 15 sts
Rnd 5: (4 sc in the next 4 st, inc) x 3 – 18 sts
Rnd 6: 18 sc
Rnd 7: (5 sc in the next 5 st, inc) x 3 – 21 sts
Rnd 8: 21 sc
Rnd 9: (6 sc in the next 6 st, inc) x 3 – 24 sts
Rnd 10: 24 sc
Rnd 11: (7 sc in the next 7 st, inc) x 3 – 27 sts
Rnd 12: 27 sc
Rnd 13: (8 sc in the next 8 st, inc) x 3 – 30 sts
Rnd 14: 30 sc
Rnd 15: (9 sc in the next 9 st, inc) x 3 – 33 sts
Rnd 16: 33 sc
Rnd 17: (10 sc in the next 10 st, inc) x 3 – 36 sts
Rnd 18: 36 sc
Rnd 19: (5 sc in the next 5 st, inc) x 6 – 42 sts
Rnd 20: 42 sc
Rnd 25: (6 sc in the next 6 st, inc) x 6 – 48 sts
Rnd 26: (7 sc in the next 7 st, inc) x 6 – 54 sts
Rnd 27: (8 sc in the next 8 st, inc) x 6 – 60 sts
Invisible fasten off.
Join green yarn, work on the front loop only:
(sc, dc, dc, sc, sl.st) * 12
REINDEER GNOME
Materials:
–Yarn: I used MILK COTTON 4ply
–Hook: 3 mm. The item is 6 inches tall
-> For the final result to be well-shaped. I recommend you to used a hook that 0.5 or 1 size smaller than what your yarn suggested.
– Fiber fill, yarn needle,
-Plastic canvas (optional if you want the gnome to stand on its own)
Abbreviation:
st – stitch
sc – single crochet
sl.st – slip stitch
BLO –Back loop only
only crochet to the back loop of the sts
INC– increase = make 2 sc from 1 st
DEC– decrease = make 1 sc from 2 sts
DC: double crochet
Note:
– Stuffing as you go. Only stuff slightly the arms (do not over stuff the arms)
HEAD &BODY:
Working in spiral, using MUSTARD color
Rnd 1: magic ring with 6 sc
Rnd 2: 6 INC– 12 sts
Rnd 3: (sc in the next st, INC) x 6 – 18 sts
Rnd 4: (2sc in the next 2 st, INC) x 6 – 24 sts
Rnd 5: (3 sc in the next 3 st, INC) x 6 – 30 sts
Rnd 6: (4sc in the next 4st,INC) x 6 – 36 sts
Rnd 7: (5sc in the next 4st, INC) x 6 – 42 sts
Rnd 8-21: BLO 42 sc
Rnd 22: (5sc in the next 4st, DEC) x 6 – 30 sts
Rnd 23: (4sc in the next 4st, DEC) x 6 – 30 sts
Rnd 24: (3 sc in the next 3st, DEC) x 6 –24 sts
Rnd 25: (2 sc in the next 2 st, DEC) x 6 – 18 sts
Rnd 26: (sc in the next st, DEC) x 6 – 12 sts
Rnd 27: 6 DEC – 6 sts
Fasten off.
ARMS: make 2
Working in spiral, start with skin color yarn:
Rnd 1: magic ring with 6 sc
Rnd 2: (sc in the next st, inc) x 3 – 9 sts
Rnd 3: 9sc
Change to red:
Rnd 4-5: 9sc
Change to green
Rnd 6-12: 9sc
Rnd 13: (sc in the next st, dec) x 3 – 6 sts
Rnd 14: fold in half, 2 sc.
Fasten off, leave yarn tail to sew to the body
How to change yarn color
GNOME’S NOSE:
Working in spiral, start with skin color yarn:
Rnd 1: magic ring with 6 sc
Rnd 2: 6 INC– 12 sts
Rnd 3: (3 sc in the next st, INC) x3 – 15 sts
Rnd 4: 15 sc
Invisible fasten off.
REINDEER’S NOSE:
Working in spiral, start with RED yarn:
Rnd 1: magic ring with 6 sc
Rnd 2: 6 INC– 12 sts
Rnd 3: (3 sc in the next st, INC) x3 – 15 sts
Rnd 4: 15 sc
Invisible fasten off.
ANTLERS: make 2
Working in spiral, start with DARK
BROWN yarn:
Tines:make 2
Rnd 1: magic ring with 6 sc
Rnd 2-3: 6 sc
Fasten off.
Main Beam: make 2
Rnd 1: magic ring with 6 sc
Rnd 2-4: 6 sc
Do not fasten off the main beam.
Continue from the beam:
Rnd 5: join the tine, make 12 sc ( 6 sc from the tine and 6 sc from the main beam)
Rnd 6: (2 sc in the next 2 sts, DEC) x3 – 9 sts
Rnd 7: (1 sc in the next st, DEC) x3 – 6 sts
Fasten off. Leave a long tail to sew to the hat
LONG TAIL HAT: (as shown in picture)
Working in spiral, start with red:
Rnd 1: magic ring with 6 sc
Rnd 2: 6 INC– 12 sts
Rnd 3: (sc in the next st, INC) x 6 – 18 sts
Rnd 4: (2sc in the next 2 st, INC) x 6 – 24 sts
Rnd 5: (3 sc in the next 3 st, INC) x 6 – 30 sts
Rnd 6: (4sc in the next 4st,INC) x 6 – 36
Rnd 7-9: 36 sc
Rnd 10: (5 sc in the next 5 st, inc) x 6 – 42 sts
Rnd 11-13: 42 sc
Rnd 14: (6 sc in the next 6 st, inc) x 6 – 48 sts
Rnd 15: 48 sc
Rnd 16: (7 sc in the next 7 st, inc) x 6 – 54 sts
Rnd 17: 54 sc
Rnd 18: (8 sc in the next 8 st, inc) x 6 – 60 sts
Rnd 19: 60 sc
Invisible fasten off.
