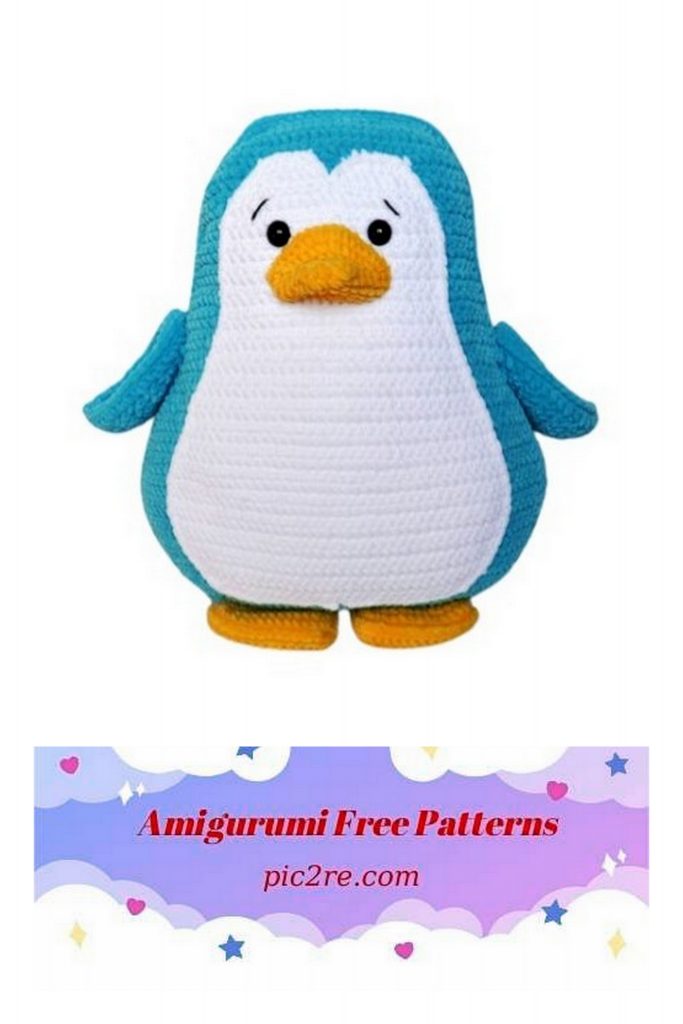
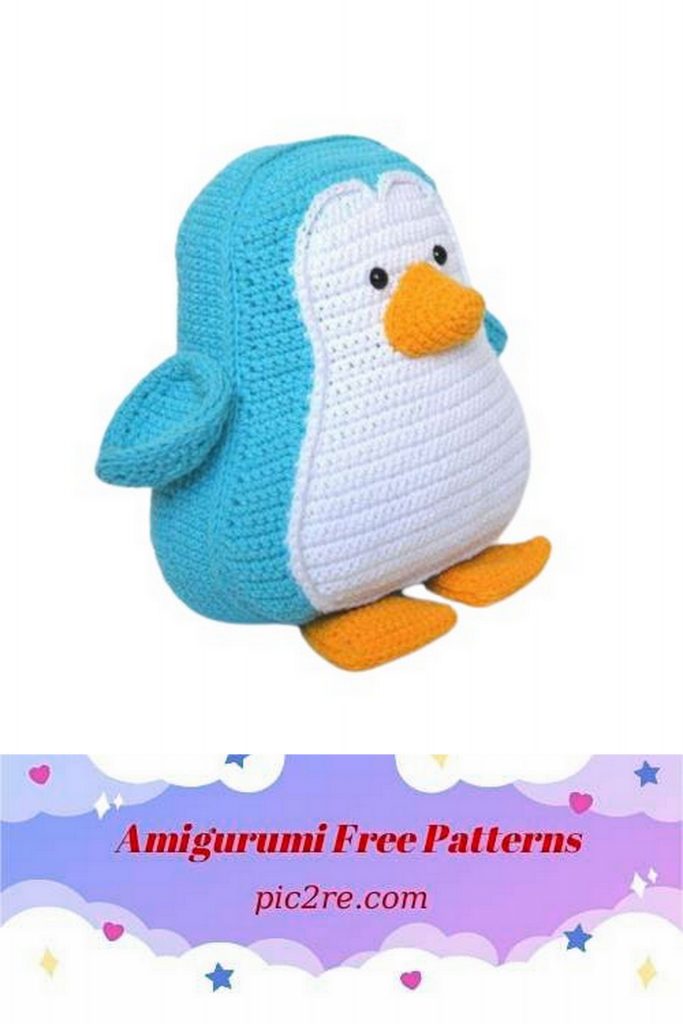
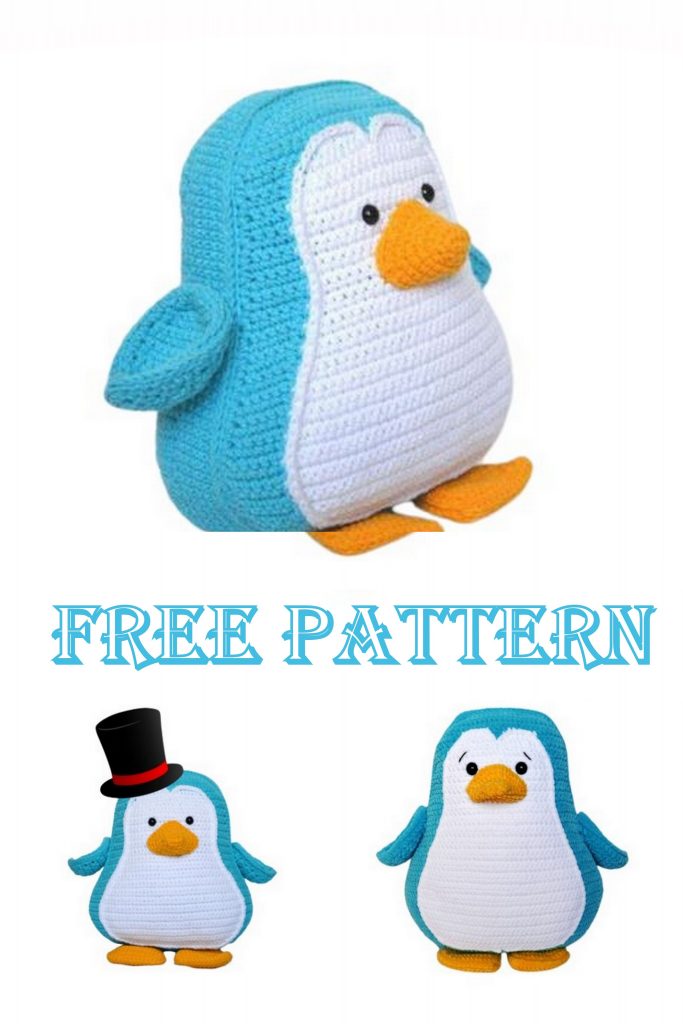
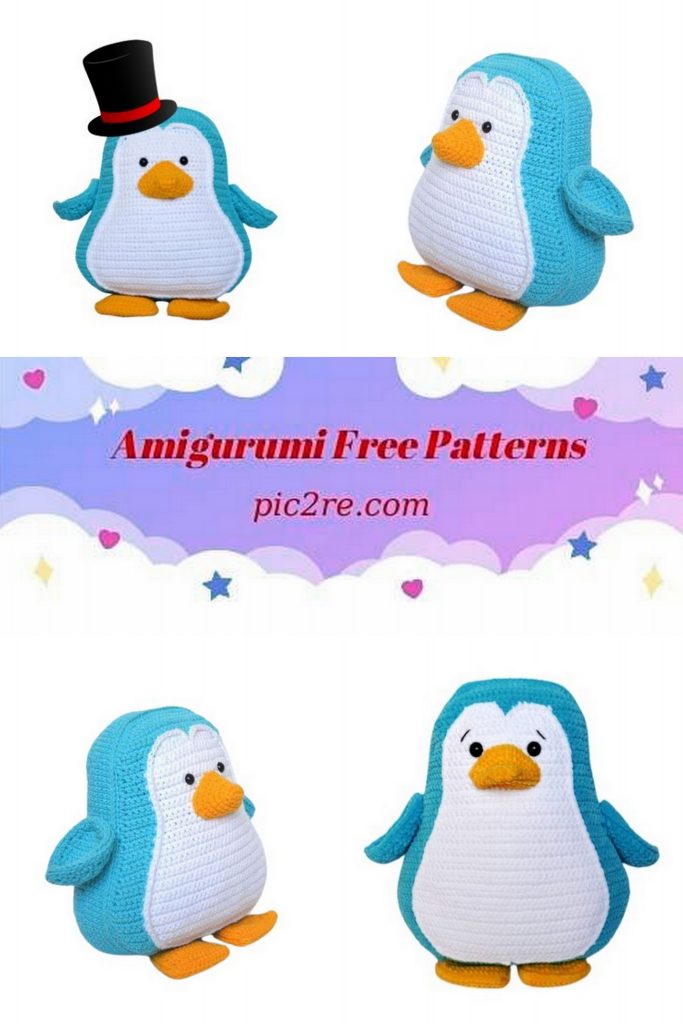
Amigurumi Little Penguin Free Pattern
List of materials and tools
yarn of three colors – for the body, for the tummy, for the beak and paws. I use YarnArt Jeans, color 55 (blue) for the body,
62 (ultra white) for the belly and 35 (yellow) for the beak and legs.
I want to draw your attention to the fact that the yarn for the body and tummy should be the same thickness;
hook for your yarn. I use #2;
eyes on a secure mount of the required diameter. I have 8 mm;
holofiber;
needle for sewing details;
scissors;
if necessary, floss for embroidery of eyebrows and eyelashes.
Have you prepared everything you need? Then get good
mood, prepare your favorite drink, sit back and start creating.
If in the process of knitting you have any questions, I will be happy to answer them. To do this, write to the profile direct
Well, shall we start?
Conventions
ch – air loop;
sc – single crochet;
inc – an increase from single crochets;
dec – decrease in single crochets;
sl-st – connecting column.
When knitting the front of the body, you will see the letters G and B.
They mean what color and how many loops you need to knit.
For example, the phrase (inc, 5 sc) G, 6B sc, 3G sc means that you need to knit (increase, 5 single crochet) in Blue, then 6 single crochet in White, 3 single crochet in Blue. The remaining abbreviations are deciphered in a similar way.
The numbers at the end of each row indicate how many loops should be at the end of knitting it.
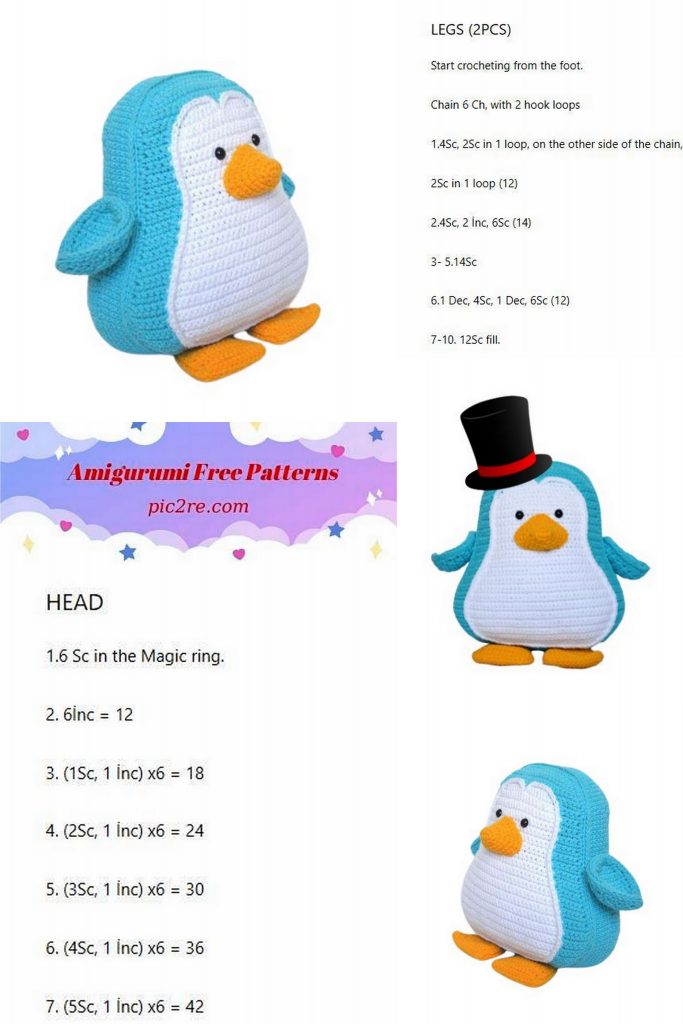
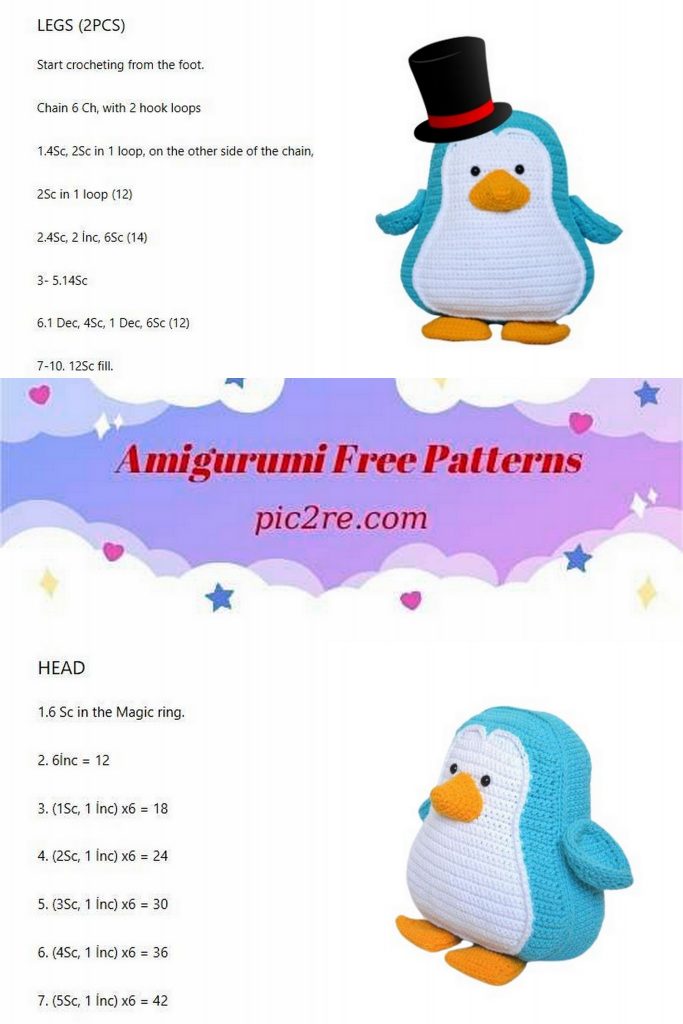
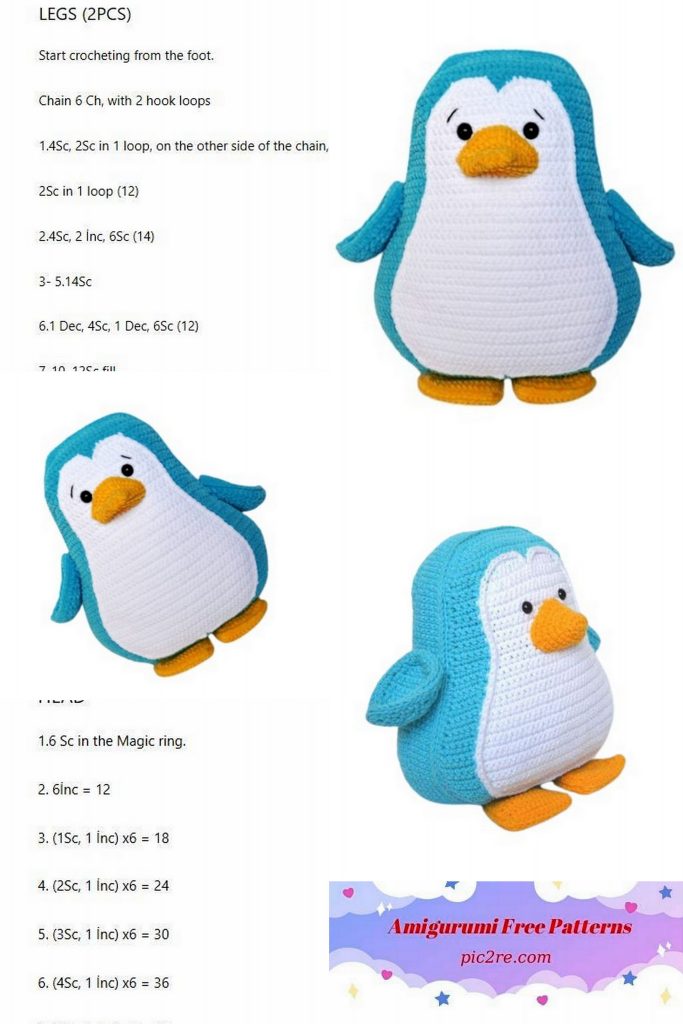
Beak
Knitted with yellow yarn.
Cast on 5 ch and continue knitting in the second loop from the hook.
1st row: inc, 2 sc, 3 sc in last st, 3 sc in reverse
2nd row: 10 sc
3rd row: 2 inc, 2 sc, 3 inc, 2sc, inc
4th row: 1sc, inc, 7sc, inc, 6sc
5 row: 2 sc, 2 inc, 6 sc, 2 inc, 6 sc
6 row: 3 sc, 2 inc, 3 sc, 2 inc, 3 sc, 2 inc, 7 sc
7th row: 4 sc, 2 inc, 5 sc, inc, 1 sc, inc, 4 sc, 2 inc, 8 sc
Fasten and cut the thread, leaving a long end for sewing.
Paws
Each paw consists of two parts, that is, in total, four parts need to be connected. Knit with yellow thread.
Cast on 7 ch and continue knitting in the second loop from the hook. Each subsequent row start with 1 ch rise.
1 row: inc, 4 sc, inc
2 row: inc, 6 sc, inc
3-4 rows (2 rows): 10 sc
5 row: inc, 8 sc, inc
6-9 rows (4 rows): 12 sc
Do not cut the thread. Next, tie the part as follows:
1 ch, 9 sc in side piece, 2 sc in first stitch of first row, 4 sc, 2 sc in last stitch of first row, 9 sc in second side piece, 2 sc in first stitch of last row, 9 sc, sl-st in ch at the beginning of the tying row. There should be 39 loops in total.
This number should be the same when tying all four parts, so that in the future it will be easier to connect the elements.
Connect the parts in pairs to each other in any way convenient for you.
Crochet connection option
When connecting the parts in this way, you need to place both parts with the wrong side inward, insert the hook from top to bottom and grab the inner half-loop of one part, then also insert the hook and grab the inner half-loop of the second part, then stretch the working thread through both half-loops. In this case, the working thread should be on the inside of the parts. There is one loop left on the hook. Then, in the same way, grab the inner half loops of the parts, you get three loops on the hook, then stretch the working thread through all three loops. On the left is the detail before tying, on the right after.
the hook again remains one loop. Repeat these steps until the end of the row. Finish knitting with a connecting column in the first loop of the row.
Important! When connecting parts in this way, you need to make sure that the half-loop of the same part is captured first. Also, the connection should be made only for the internal half-loops.
Crochet pattern. When using this method, a neat pigtail is obtained between the parts.
Do not stuff details. Hide the ends of the threads.
Wings
Each wing consists of two parts, i.e. all you need to connect four details. Knit with a thread of the main color.
Cast on 5 ch and continue knitting in the second loop from the hook.
Each subsequent row start with 1 ch rise.
1 row: inc, 2 sc, inc
2 row: inc, 4 sc, inc
3 row: inc, 6 sc, inc
4 row: 10 sc
5 row: inc, 8 sc, inc
6-10 p: poisons (5 rows): 12 sc
11 row: dec, 8 sc, dec
12 row: dec, 6 sc, dec
13 row: dec, 4 sc, dec
14 row: dec, 2 sc, dec
15 row: 2 dec
16 row: dec
Do not cut the thread. Tie the piece as follows:
1 ch, 16 sc on the side, 2 sc in first st of the first row, 2 sc, 2 sc in the last st of the first row, 16 sc in the second side part, 1 sc, sl-st in ch at the beginning of the binding row. There should be 37 loops in total.
This number should be the same when tying all four parts.
Connect the parts in pairs to each other in any way convenient for you.
To make the wings concave, when connecting the parts you need:
tighten the working thread;
use a smaller hook;
on each side of one part, grab two half loops, not one. It turns out that you knit two loops together.
Tail
The tail consists of two parts. Knit with a thread of the main color.
Cast on 5 ch and continue knitting in the second loop from the hook.
Each subsequent row start with 1 ch rise.
1 row: inc, 2 sc, inc
2 row: inc, 4 sc, inc
3 row: inc, 6 sc, inc
4 row: 10 sc
5 row: inc, 8 sc, inc
6 row: 12 sc
7 row: inc, 10 sc, inc
8 row: 14 sc
Do not stuff details. Hide the ends of the threads.
Do not cut the thread, but continue tying the part:
1 ch, 8 sc in the side piece, 2 sc in the first stitch of the first row, 2 sc, 2 sc in the last stitch of the first row, 8 sc in the second side piece. There should be 22 loops in total.
This number should be the same when tying both parts. Connect the parts together in any convenient way.
In this case, the connection of parts along the last row is not necessary. It turns out a kind of “hat”.
front part
Cast on 20 ch with base color and continue knitting in the second loop from the hook. Each subsequent row start with 1 ch rise.
1 row: inc, 17 sc, inc
2nd row: inc, 19 sc, inc
3 row: inc, 21 sc, inc
4 row: inc, 23 sc, inc
Next, enter the white thread.
Important! I advise you to knit with a thread of the main color from two balls (or use different ends of one ball) to avoid broaches on the tummy.
5 row: (inc, 5 sc), 6B sc, 3 sc, 6B sc, (5 sc, inc)
6 row: (inc, 5 sc), 8B sc, 1 sc, 8B sc, (5 sc, inc)
7 row: 6 sc, 19B sc, 6 sc
8 row: 5 sc, 21B sc, 5 sc
9-13 rows (5 rows): 4 sc, 23B sc, 4 sc
14 row: (inc, 3 sc), 23B sc, (3 sc, inc)
15-16 rows (2 rows): 5 sc, 23B sc, 5 sc
17 row: (inc, 4 sc), 23B sc, (4 sc, inc)
18-19 rows (2 rows): 6 sc, 23B sc, 6 sc
20 row: (inc, 4 sc), 25B sc, (4 sc, inc)
21 row: 6 sc, 25B sc, 6 sc
22 row: (inc, 4 sc), 27B sc, (4 sc, inc)
23 row: 6 sc, 27B sc, 6 sc
24 row: (inc, 4 sc), 29B sc, (4 sc, inc)
25 row: 6 sc, 29B sc, 6 sc
26 row: (inc, 4 sc), 31B sc, (4 sc, inc)
27 row: (inc, 4 sc), 33B sc, (4 sc, inc)
28 row: 6 sc, 33B sc, 6 sc
29 row: (inc, 4 sc), 35B sc, (4 sc, inc)
30 row: 6 sc, 35B sc, 6 sc
31 row: (inc, 4 sc), 37B sc, (4 sc, inc)
32 row: 6 sc, 37B sc, 6 sc
33 row: (inc, 4 sc), 39B sc, (4 sc, inc)
34-37 rows (4 rows): 6 sc, 39B sc, 6 sc
38 row: (dec, 5 sc), 37B sc, (5 sc, dec)
39 row: 6 sc, 37B sc, 6 sc
40 row: (dec, 5 sc), 35B sc, (5 sc, dec)
41 row: 6 sc, 35B sc, 6 sc
42 row: (dec, 5 sc), 33B sc, (5 sc, dec)
43 row: (dec, 5 sc), 31B sc, (5 sc, dec)
44 row: (dec, 5 sc), 29B sc, (5 sc, dec)
In the next row after knitting, cut off the white thread and fasten.
45 row: (dec, 5 sc), 27B sc, (5 sc, dec)
The remaining rows are knitted in the main color only.
46 row: 2 dec, 31, 2 dec
47 row: 2 dec, 27, 2 dec
48 row: 2 dec, 23, 2 dec
49 row: 2 dec, 19, 2 dec
If when knitting you used yarn of the same thickness, then the part will be flat. If the yarn for the tummy was thinner (thicker), then the tummy will be pulled together (stretched).
Do not cut the thread, but continue tying the part:
1 ch, 49 sc in side piece, 2 sc in first st of top row, 17 sc, 2 sc in last st of top row, 49 sc in second side piece, 2 sc in first st of bottom row, 22 sc, sl-st in ch at the beginning of the tying row.
There should be 143 loops in total. Fasten the thread and cut.
Next, if you don’t like how the tummy-to-body border looks, you can make a harness. To do this, you need to fasten the working thread at the top of the middle sc of the 6th row (see photo) and use the connecting posts to tie the tummy along the contour.
You can use the thread of both the main color and the color of the tummy. I used two strands of white thread.
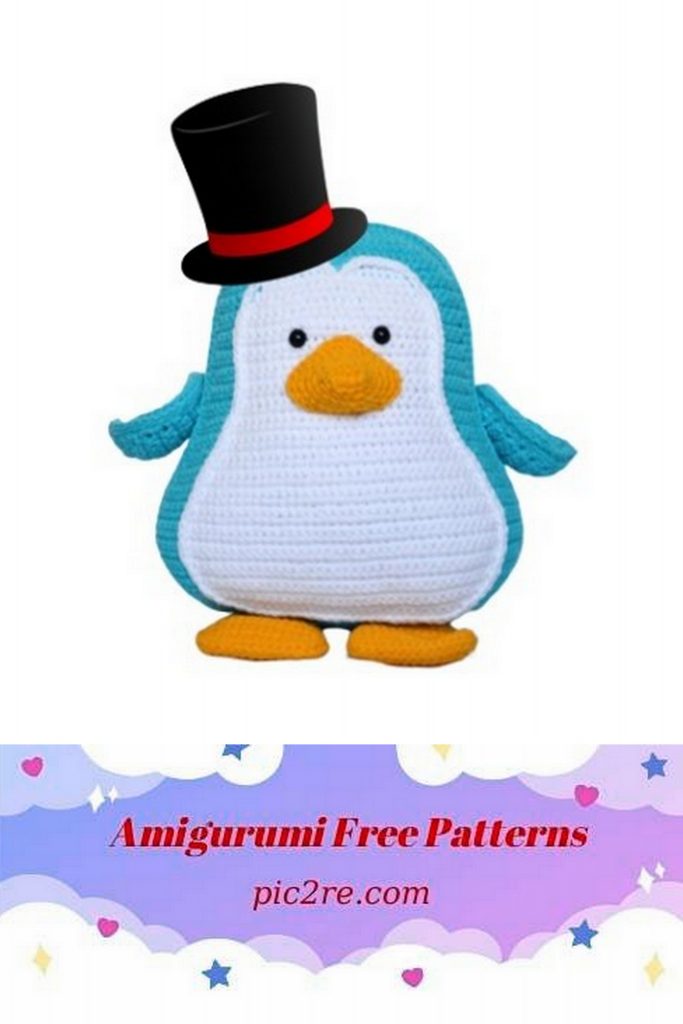
Insert safe eyes (I have at the level of the 11th row, about 8 loops between the eyes), sew on the beak. Optionally, you can embroider eyebrows and eyelashes.
The place of attachment of the working thread for tying the tummy along the contour.
In the process of sewing on the beak, the part needs to be stuffed a little.
Back
Knit with a thread of the main color.
Cast on 20 ch and continue knitting in the second loop from the hook.
Each subsequent row start with 1 ch rise.
1 row: inc, 17 sc, inc
2nd row: inc, 19 sc, inc
3 row: inc, 21 sc, inc
4 row: inc, 23 sc, inc
5 row: inc, 25 sc, inc
6 row: inc, 27 sc, inc
7-13 rows (7 rows): 31 sc
14 row: inc, 29 sc, inc
15-16 rows (2 rows): 33 sc
17 row: inc, 31 sc, inc
18-19 rows (2 rows): 35 sc
20 row: inc, 33 sc, inc
21 row: 37 sc
22 row: inc, 35 sc, inc
23 row: 39 sc
24 row: inc, 37sc, inc
25 row: 41 sc
26 row: inc, 39 sc, inc
27 row: inc, 41 sc, inc
28 row: 45 sc
29 row: inc, 43 sc , inc
30 row: 47 sc
31 row: inc, 45 sc, inc
32 row: 49 sc
33 row: inc, 47 sc, inc
34-37 rows (4 rows): 51 sc
38 row: dec, 47 sc, dec
39 row: 49 sc
40 row: dec, 45 sc, dec
41 row: 47 sc
42 row: dec, 43 sc, dec
43 row: dec, 41 sc, dec
44 row: dec, 39 sc, dec
45 row: dec, 37sc, dec
46 row: 2 dec, 31, 2 dec
47 row: 2 dec, 27, 2 dec
48 row: 2 dec, 23, 2 dec
49 row: 2 dec, 19, 2 dec
Do not cut the thread, but continue tying the part:
1 ch, 49 sc in side piece, 2 sc in first st of top row, 17 sc, 2 sc in last st of top row, 49 sc in second side piece, 2 sc in first st of bottom row, 22 sc, sl-st in ch at the beginning of the tying row. There should be 143 loops in total.
Do not cut the thread.
The number of loops when tying the front and back must be the same.
Next, knit 5-6 rows, depending on the desired thickness of the toy. Keep in mind that the thickness of the toy will increase after stuffing. With circular knitting, do not make lifting loops.
Connect the front and back in any way convenient for you, evenly stuffing the toy with filler.
Assembling the toy
So, at this stage we have:
body of a penguin;
pair of wings;
a pair of paws;
ponytail.
As a rule, I sew all the details “by eye”. Focus on your taste. Pin the wings on the sides of the calf and see how you like it best. My wings are sewn at the level of the 20th row of the body.
The tail is sewn in the center of the back at the level of 34 rows, while the part must be slightly stuffed. In height, the sewn ponytail occupies 8–9 rows.
The paws are sewn to the lower part of the body of the toy.
That’s it! Now you are the proud owner of a soft cuddly penguin. Thanks for being with me.