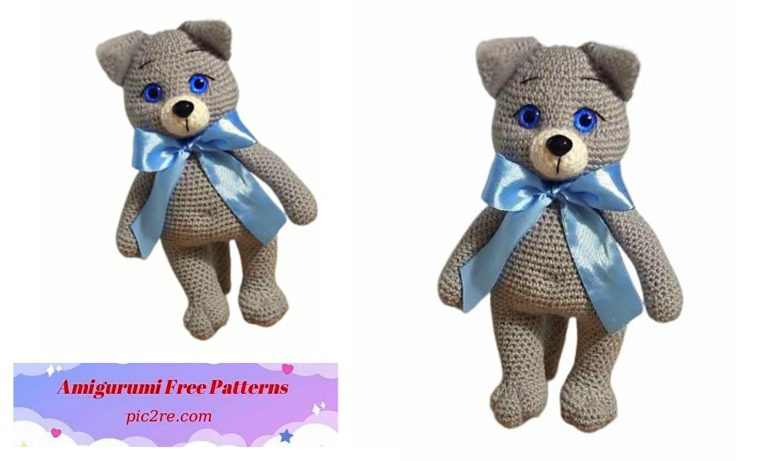
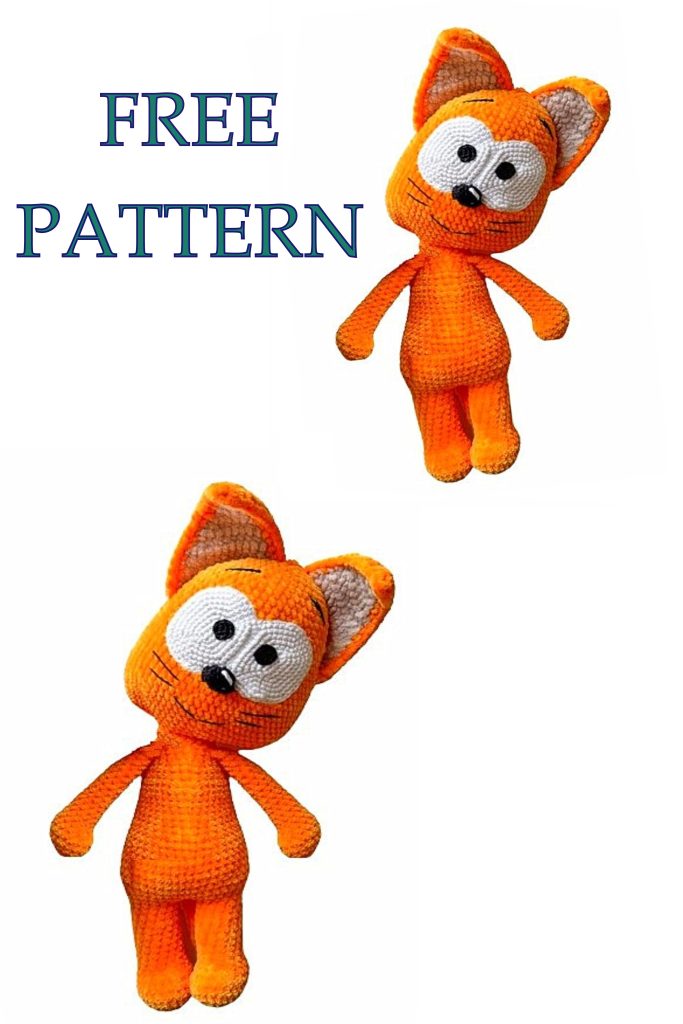
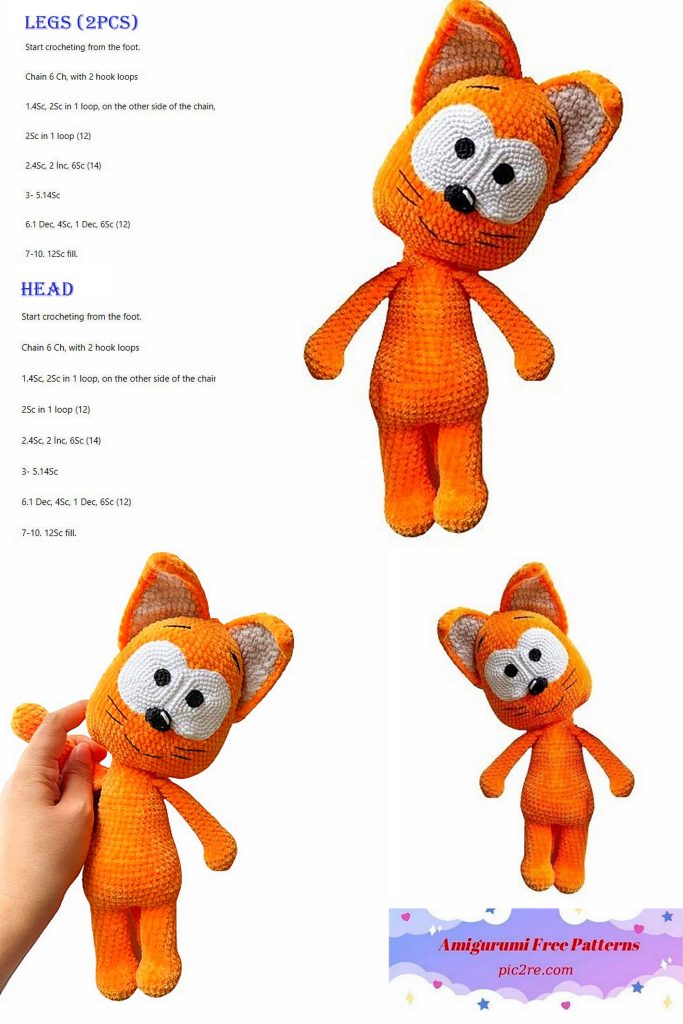
Amigurumi Velvet Cute Cat Free Pattern
Discover a delightful DIY project with our free pattern to create a charming Velvet Cute Cat Amigurumi. Perfect for crochet enthusiasts, this pattern offers step-by-step instructions to craft your own cuddly companion. Dive into the world of amigurumi and bring this adorable feline to life!
Necessary materials
• 1.5-2 skeins of plush yarn 100g/120m or 100g/175m of the main color • A little plush yarn of an additional color for the ears.
• A little white cotton or semi-cotton yarn; for knitting, cut them from felt).
• A little black cotton or semi-cotton yarn for knitting.
• Crochet hook. I use hook number 3 for 100g/120m yarn and hook number 2 for cotton yarn.
• Filler.
• Needle.
• Beginning of row marker.
• Scissors. row.
• Optionally, wire to strengthen the neck and a coil plaster.
Abbreviations
MR – amigurumi ring.
Ch – air loop.
Sc – single crochet.
Dc – single crochet
Dec – decrease.
İnc – increase.
HDC – half double crochet.
Sl-st – connecting post.
(…)*n – repeat what is indicated in brackets n times.
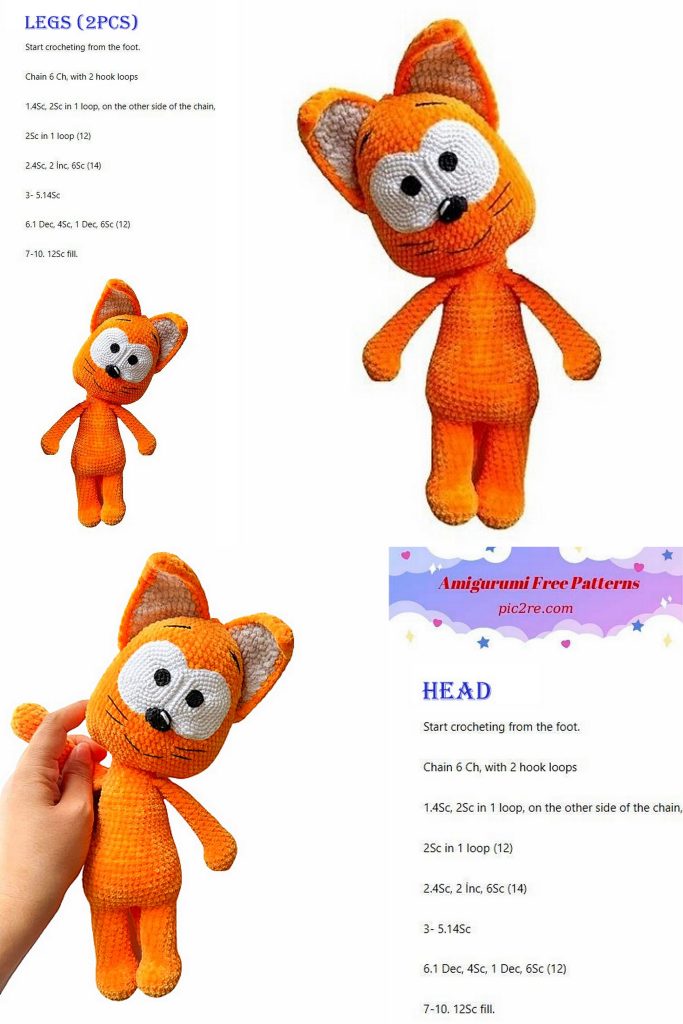
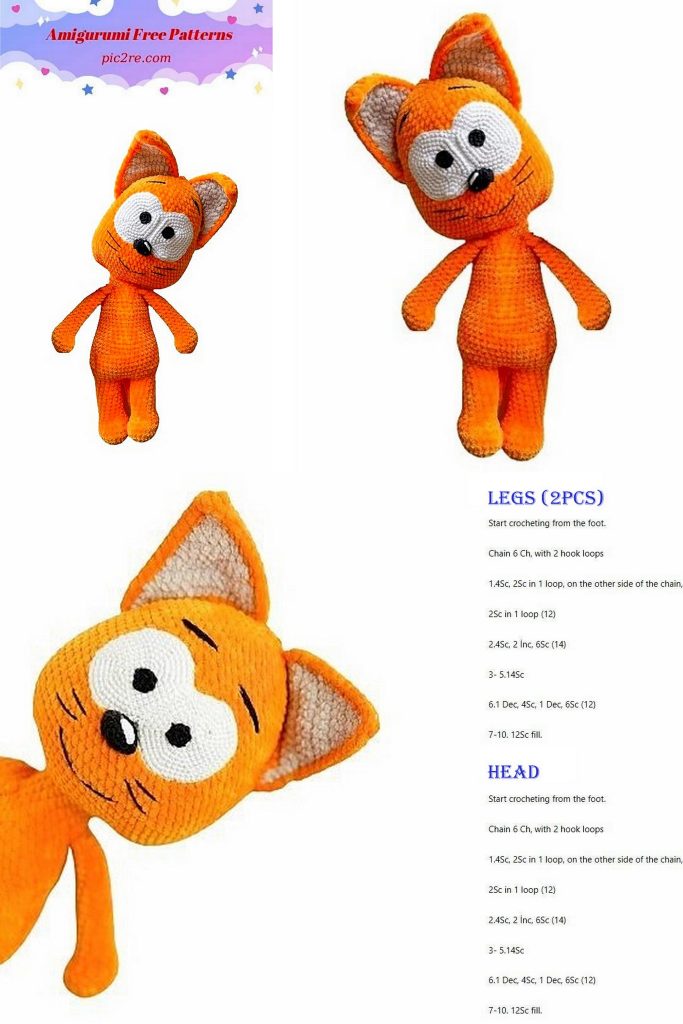
Upper legs (2 parts)
We knit with the main color.
1.6Sc in MR (6)
2.6İnc (12)
3.(1Sc, İnc)*6 (18)
4-5. (2 rows) 18Sc (18)
6. 6Dec, 6Sc (12)
We fill the part only up to this point.
7-21. (15 rows) 12Sc
Fold in half and knit 6Sc. If necessary, make offset columns before this, so as to fold the parts in half parallel to the decreases in the 6th row.
Fasten and cut the thread, we will knit the paws.
Tail
1.4Sc in MR (4)
2.4Sc (4)
3.(1Sc, İnc)*2 (6)
4-8. (5 rows) 6Sc (6)
9. 2Sc, 2İnc, 2Sc (8)
10-12. (3 rows) 8Sc (8)
Fold the piece in half and knit 4Sc. Fasten and cut the thread, we will tie the tail.
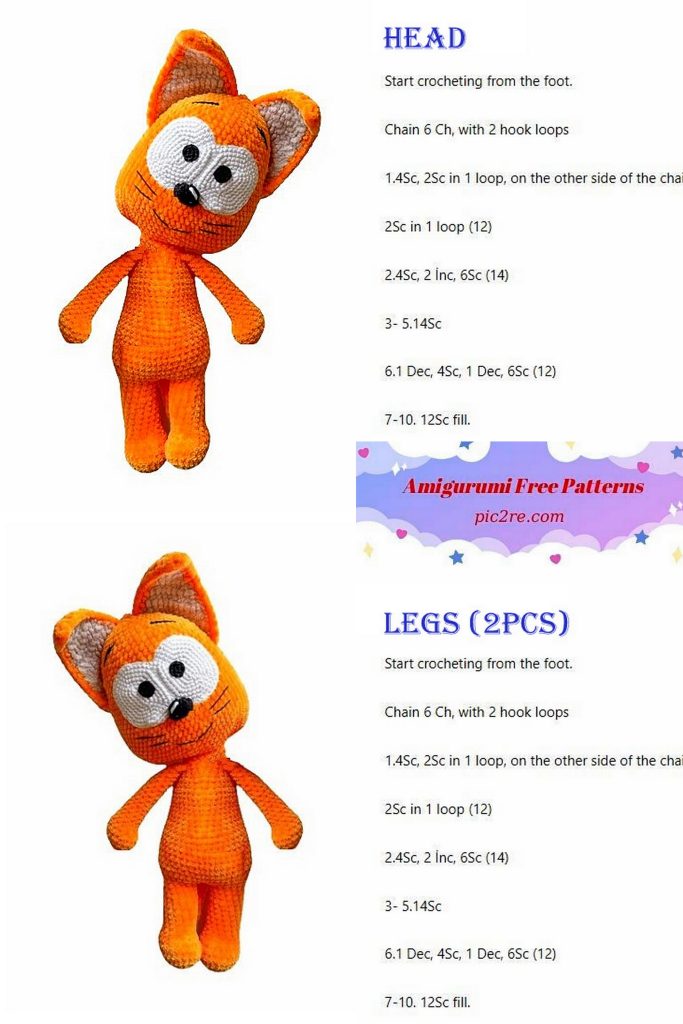
Lower legs (2 parts)
Crochet for plush yarn (mine is number 2).
We knit a chain of 6Ch, continue knitting from the second loop from the hook
1.4Sc, 3Sc in 1, 3Sc, inc (12)
2.İnc, 3Sc, 3İnc, 3Sc, 2İnc (18)
3. 1Sc, İnc, 3Sc, (1Sc, İnc)*3, 3Sc, (1Sc, İnc)*2 (24)
4.-5. 24Sc (24)
6. 5Sc, 6Dec, 7Sc (18)
7. Dec, 4Sc, 3Sc together, 7Sc, Dec (14)
8-17. (10 rows) 14Sc (14)
On the first leg we make offset columns, so that the end of the row is exactly to the right (see photo), I got an additional 6Sc. We fasten the thread and cut it.
We knit exactly the same second leg, in the last row we unknit a few stitches, so that the end of the row is exactly on the left (see photo), I had 3Sc left unknitted, we do not cut off the thread on the second leg.
Be careful, everyone has a different knitting density and way of gripping the thread, so you may need to not knit stitches on the first leg or knit extra stitches on the second leg.
We fill both legs tightly.
Body
Let’s move on to knitting the body.
1. We cast on 2Ch and connect the legs using Sl-st, 14Sc on the first leg, 2Sc on the chain from Ch, 14Sc on the second leg, 2Sc on the chain from Ch, we knit an additional 8Sc for offset, so that we have a marker for the beginning of the row was exactly on the left side. Place a marker and continue knitting (32)
2.(3Sc, İnc)*8 (40)
3.(İnc, 19Sc)*2 (42)
4. In this row we knit the tail, make sure that it is exactly in the middle of the back. 9Sc, 4Sc with tail, 29Sc (42)
5-10. (6 rows) 42Sc (42)
11. 24Sc, (1Sc, Dec)*6 (36) decreases are located on the stomach.
As we knit, we fill the part.
12-18. (7 rows) 36Sc (36)
19. (4Sc, Dec)*6 (30)
20-21. (2 rows) 30Sc (30)
22. (3Sc, Dec)*6 (24)
23.24Sc (24)
24. In this row we knit the upper legs
2Sc on the body, 6Sc with the paw, 5Sc on the body, 6Sc with the paw, 5Sc (24)
25. (2Sc, Dec) (18)
26-27. (2 rows) 18Sc (18)
We don’t cut the thread, we move on to knitting the head.
Head
1.5Sc around the neck, cast on 6Ch from the second loop from the 5 Sc hook, 9Sc around the neck, again cast on 6Ch from the second loop from the 5Sc hook, 4Sc around the neck (40)
2. 5Sc, 5Sc on the chain, 3Sc on the top loop of the chain, 5 Sc on the other side of the chain, 9Sc, 5Sc on the chain, 3Sc on the top loop of the chain, 5Sc on the other side of the chain, 4Sc (44)
3. İnc, 20Sc, 2İnc, 20Sc, İnc (48)
4. (7Sc,İnc)*6 (54)
5. (8Sc, İnc)*6 (60)
6. (9Sc, İnc)*6 (66)
7-16. (10 rows) 66Sc (66)
Take a piece of wire equal to the size of the body and plus 10 cm, bend the ends of the wire so that there are large loops at the ends, wrap it with a plaster and insert it into the body and neck, so that the small end remains in the head. Fill the neck tightly and fill the head as you knit.
17. (9Sc, Dec)*6 (60)
18-19. (2 rows) 60Sc (60)
20. (8Sc, Dec)*6 (54)
21-22. (2 rows) 54Sc (54)
23. (7Sc, Dec)*6 (48)
24.48Sc (48)
25. (6Sc, Dec) (42)
26.42Sc (42)
27. (5Sc, Dec)*6 (36)
28.36Sc (36)
29. (4Sc, Dec)*6 (30)
Fill your head to the full
33. (3Sc, Dec)*6 (24)
34. (2Sc, Dec)*6 (18)
35. (1Sc, Dec)*6 (12)
36. 6Dec (6)
Carefully tighten the hole
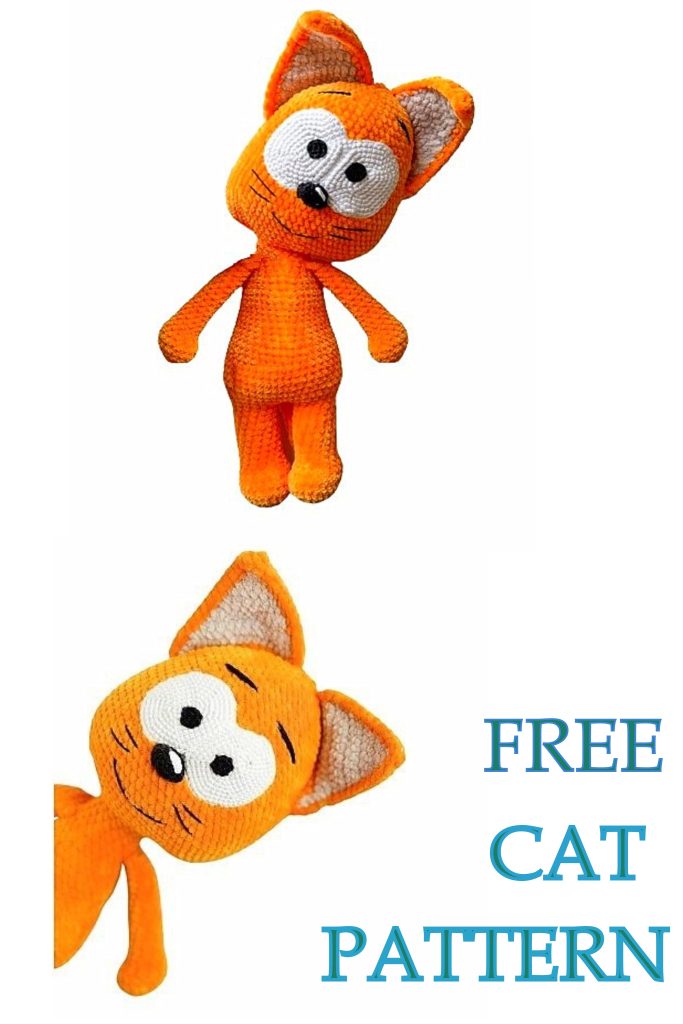
Ears
The ears are knitted from two parts, one in the main color and one in an additional color.
We start knitting with a piece of an additional color.
We knit in turning rows. At the end of each row, make a Ch and turn the knitting.
1. We cast on 2Ch, in the second loop from the hook we knit 3Sc (3)
2.İnc, 2Sc (4)
3.3Sc, inc (5)
4.İnc, 4Sc (6)
5.5Sc,inc (7)
6.İnc, 6Sc (8)
7. 7Sc, İnc (9)
8. İnc, 8Sc(10)
9. 9Sc, İnc (11)
10. İnc, 10Sc (12)
11. 11Sc, İnc (13) KNITTING DOES NOT OPEN
We knit a chain of 3Ch, turn the knitting so that the ear looks down (see photo) from the second loop from the hook we knit 2Sc and Sl-st in the last loop before the chain Ch.
On the part of an additional color thread fasten and cut.
We knit a piece of the main color in exactly the same way, after which we put both pieces together and knit in a circle Sc, in the top loop of the ear, knit (Hdc, Dc, Hdc). We finish knitting with Sl-st, secure the thread, if you plan to sew with the same thread, then leave the tip for this.
I sew with cotton thread, so I cut the thread and hide the tip inside the piece.
ATTENTION!
When tying the parts of the second ear together, please note that the protrusion on the ear (chain Sc) should point in the opposite direction from the first ear, so the parts must be folded so that the protrusion faces the other direction (see photo) and the binding will be in the opposite direction
Nose
We knit with black cotton yarn and crochet number 2.
1. We cast on a chain of 6Ch, from the second loop from the hook we knit 4Sc, 3Sc in one loop, on the other side of the chain – 3Sc, İnc (12)
2. 12Sc (12)
We fasten the thread, leaving the tip for sewing.
We embroider a highlight with white thread.
Eyes
We knit with white cotton yarn and crochet number 2.
1. We cast on a chain of 6Ch, from the second loop from the hook we knit 4Sc, 3Sc in one loop, on the other side of the chain 3Sc, İnc (12)
2.İnc, 3Sc, 3İnc, 3Sc, 2İnc (18)
3.1Sc, İnc, 3Sc, (1Sc, İnc)*3, 3Sc, (1Sc, İnc)*2 (24)
4.2Sc, inc, 3Sc, (2Sc, inc)*3, 3Sc, (2Sc, inc)*2 (30)
5.3Sc, İnc, 3Sc, (3Sc, İnc)*3, 3Sc, (3Sc, İnc)*2 (36)
6.4Sc, İnc, 3Sc, (4Sc, İnc)*3, 3Sc, (4Sc, İnc)*2 (42)
Try the eyes to the head, you may need to make a row less or more, keep in mind that there will be one more row of binding. If you need to increase, then make the required number of rows with uniform increases according to the same principle as the previous ones.
We fasten the thread on the first part and cut it off.
We knit exactly the same second piece, without cutting the thread.
Now we need to connect two eyes, for this we knit Sc on the second part until the first increase, and we knit the first stitch of increase, we will already knit the second together with the second part (If you knitted the same number of rows as I did, then you need to knit 5 Sc ).
We put the parts together with the front sides facing each other, we will knit on the wrong side.
For convenience, you can mark on both parts the last loop of the first increase and the first loop of the next increase.
We knit the loops of both parts Sc, I got 9Sc.
We turn the knitting with the front side towards us, make a Ch and knit in a circle using Sc, at the end we make a Sl-st in the first Ch.
Leave the thread for sewing.
If the fabric is a little askew, you can simply straighten it carefully with your hands, pulling in the desired direction.
Pupil
We knit with black cotton yarn, crochet number 2.
1.6Sc in MR (6)
2. We close the ring using Sl-st, leaving the thread for sewing.
Decor
We sew the pupil to the eye, approximately in the middle, after that we sew the eyes to the head; for convenience, you can pre-fix them with pins.
Sew on the nose, add a little filler if necessary.
We embroider the mustache, mouth and eyebrows with black thread.
To hide the threads from embroidery, insert the thread at one point, leaving a tail; after finishing the work, bring it out exactly at the same point, make a knot and then hide it inside the head.
We sew on the ears, starting from the very top of the head. And your Kitten is ready!